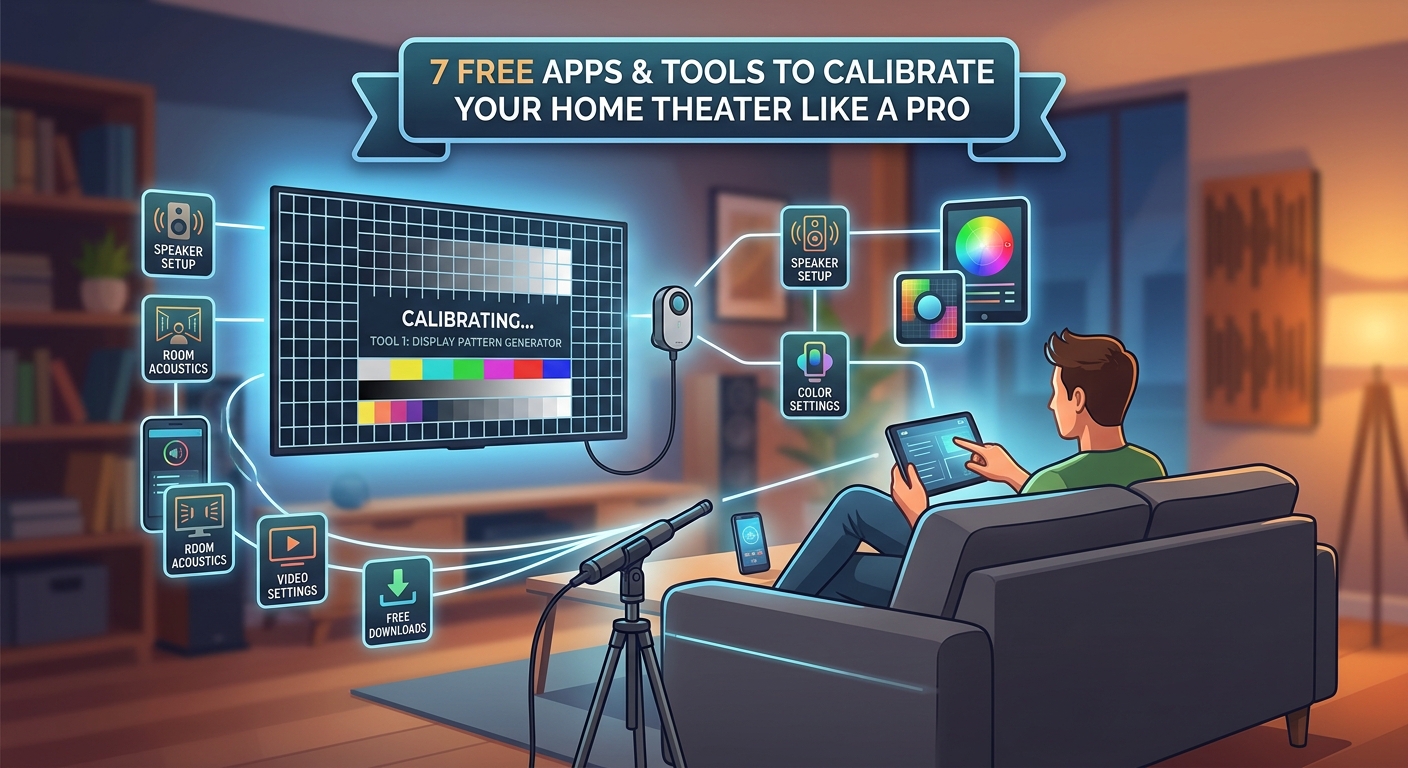
Getting professional-level picture and sound from your home theater doesn’t require a thousand-dollar calibration service. The right apps can help you measure, adjust, and optimize your system using just your smartphone, a laptop, and some patience. These tools put calibration capabilities that once cost thousands into your hands for free.
Home theater calibration apps provide free or affordable alternatives to professional services by measuring speaker distances, testing frequency response, analyzing video patterns, and generating correction filters. Most work with basic equipment you already own like smartphones and microphones. Combining multiple apps gives you the most complete calibration toolkit without spending hundreds on dedicated hardware meters.
Why Apps Beat Guesswork for Calibration
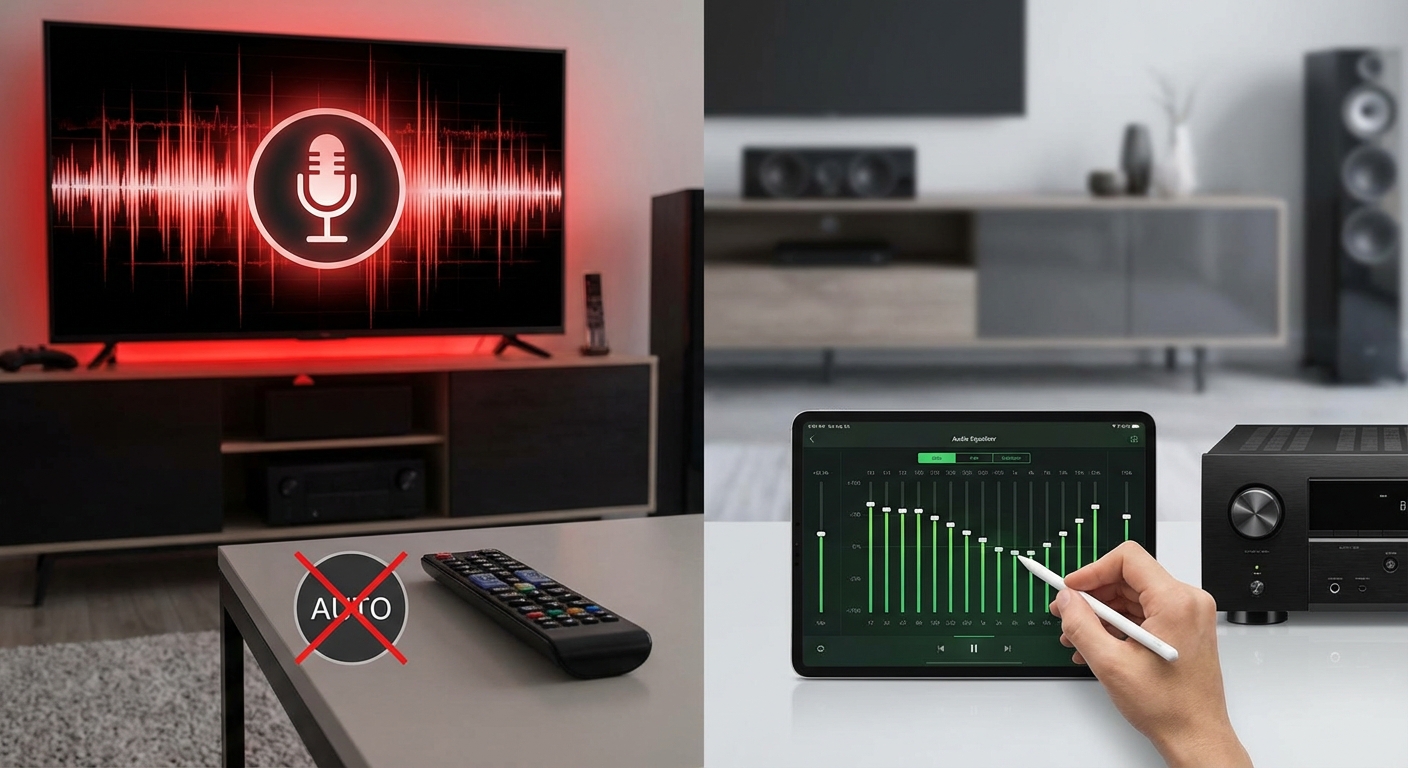
Your receiver’s auto-calibration system might get you 70% of the way there. But those built-in microphones and algorithms often miss room-specific problems that apps can identify and help you fix.
Apps let you see what’s actually happening in your room. You get visual feedback on frequency response curves, speaker phase relationships, and video color accuracy. That visibility makes fixing problems much easier than adjusting settings blindly.
Most importantly, apps give you repeatable measurements. You can test a setting, change it, then test again to see if you made things better or worse. That feedback loop is how you actually learn what works in your specific space.
Sound Calibration Apps That Actually Work
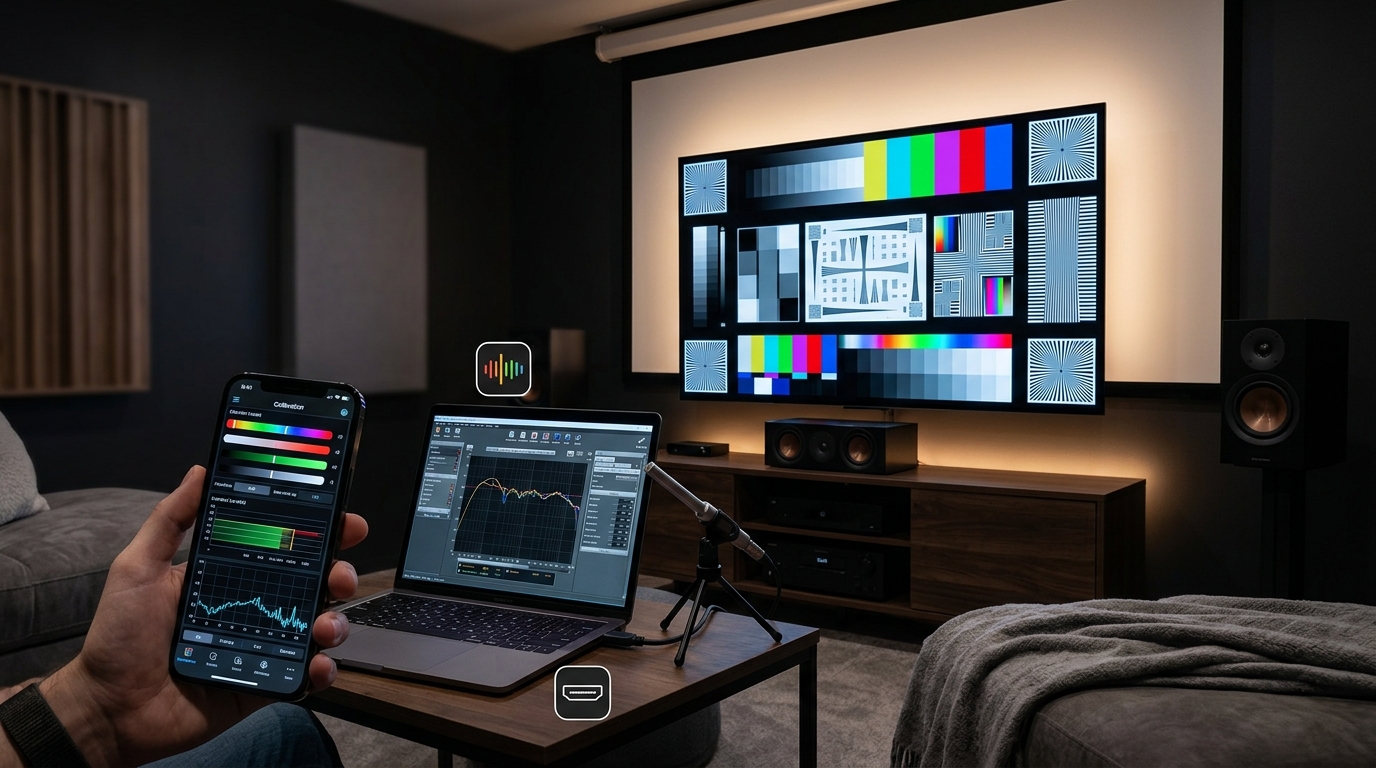
REW (Room EQ Wizard)
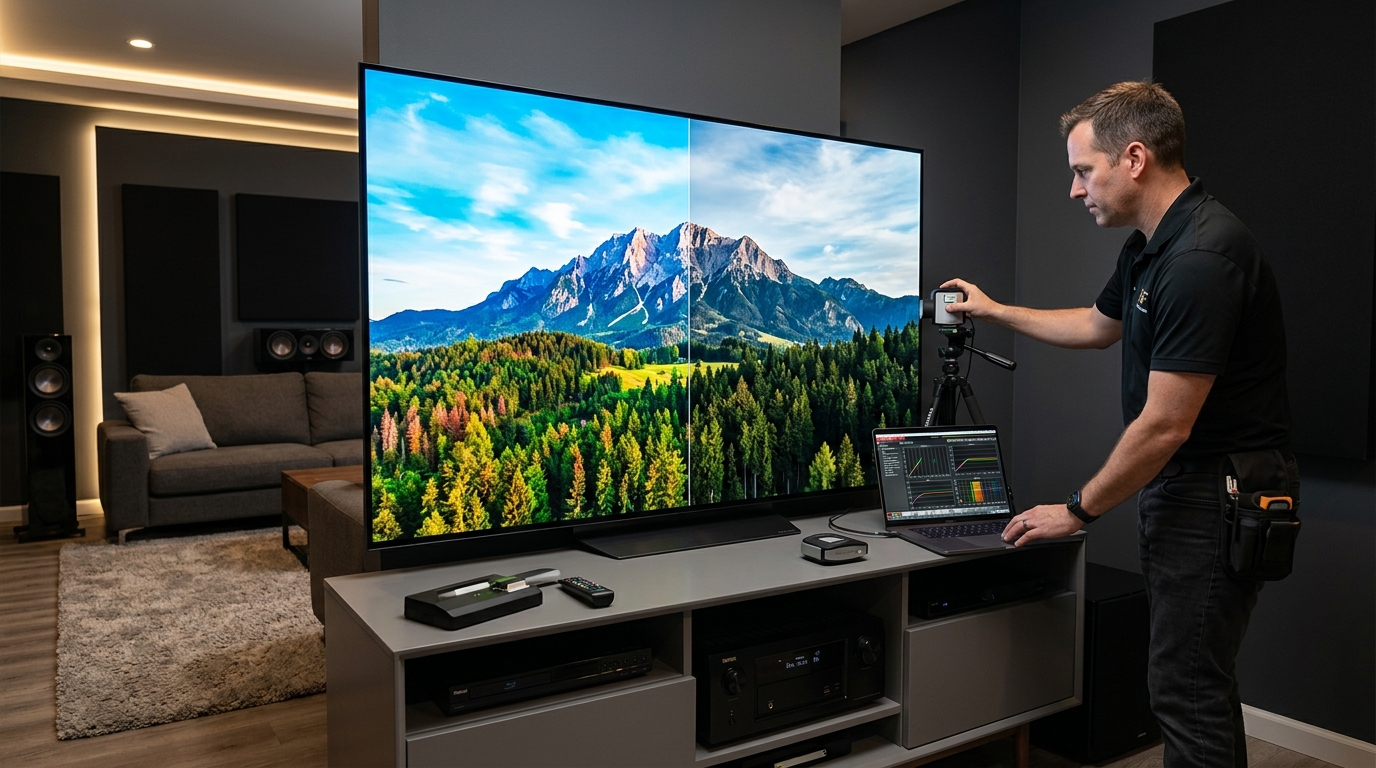
This free Windows and Mac application is the gold standard for audio measurement. REW generates test tones, captures your room’s response through a calibrated microphone, and displays detailed graphs showing exactly where your system has problems.
You’ll need a USB measurement microphone like the MiniDSP UMIK-1 (around $75). That’s your only hardware cost, but it turns REW into a tool that rivals equipment costing thousands.
REW shows you:
- Frequency response at each listening position
- Speaker delay and phase alignment
- Room modes and resonances
- Waterfall plots revealing decay times
The learning curve is steeper than simpler apps, but the measurement accuracy is unmatched. If you’re serious about getting your room correction systems compared working properly, REW shows you exactly what they’re correcting.
AudioTool App
This smartphone app turns your phone into a real-time analyzer for about $15. It’s not free, but it’s far cheaper than dedicated RTA hardware.
AudioTool measures sound pressure levels, displays frequency response in real time, and helps you identify problem frequencies during acoustic panel placement. The interface is clean and the measurements update fast enough to see changes as you adjust settings.
The phone’s built-in microphone isn’t calibrated, so absolute measurements won’t be laboratory-accurate. But for relative comparisons and identifying major problems, it works well.
Dirac Live
Some receivers include Dirac Live room correction. The mobile app walks you through measuring your room at multiple positions, then generates correction filters automatically.
The free version included with compatible receivers handles basic correction. The paid upgrade ($99-$499 depending on features) adds bass control and more measurement positions.
What makes Dirac different is how it corrects both frequency response and timing issues simultaneously. You get tighter bass, clearer dialogue, and better imaging without the harshness some correction systems add.
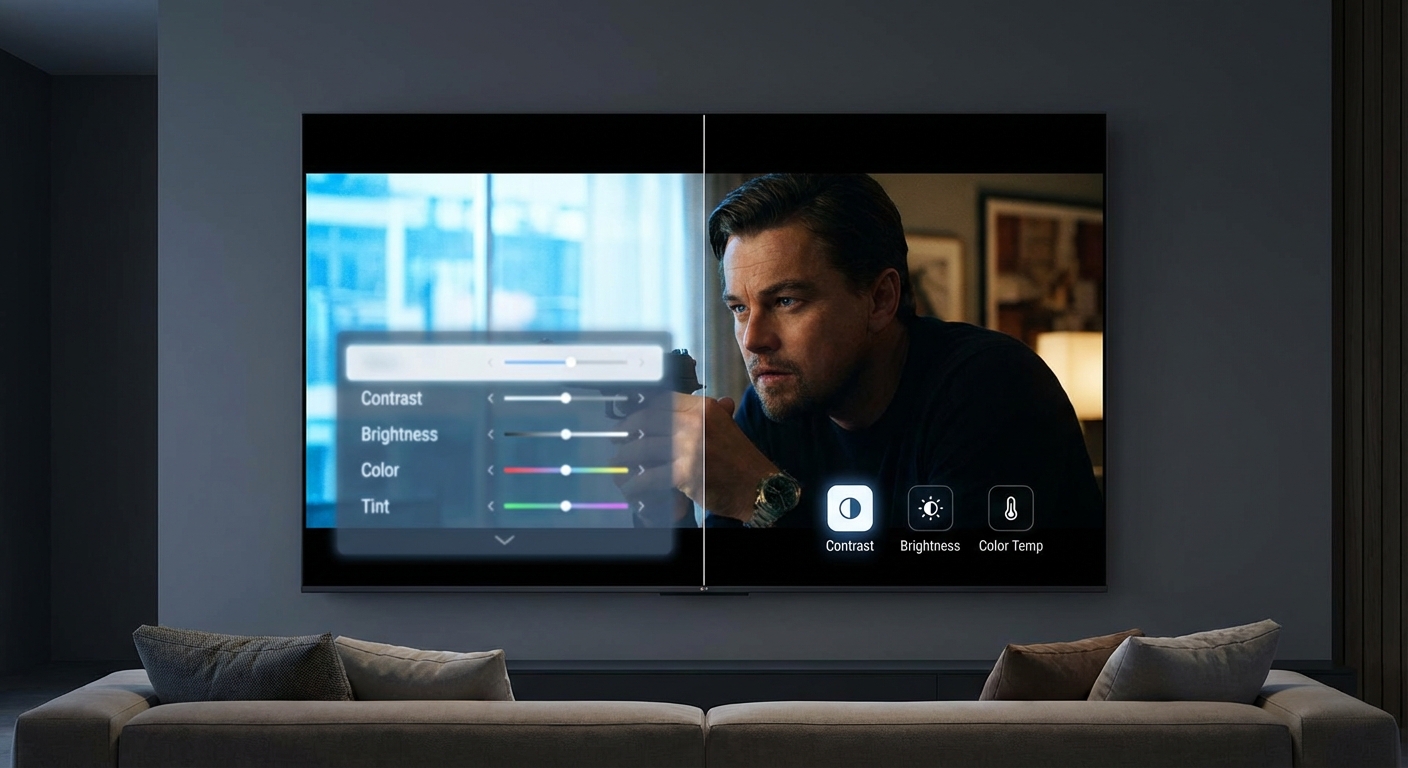
Video Calibration Apps You Can Actually Use
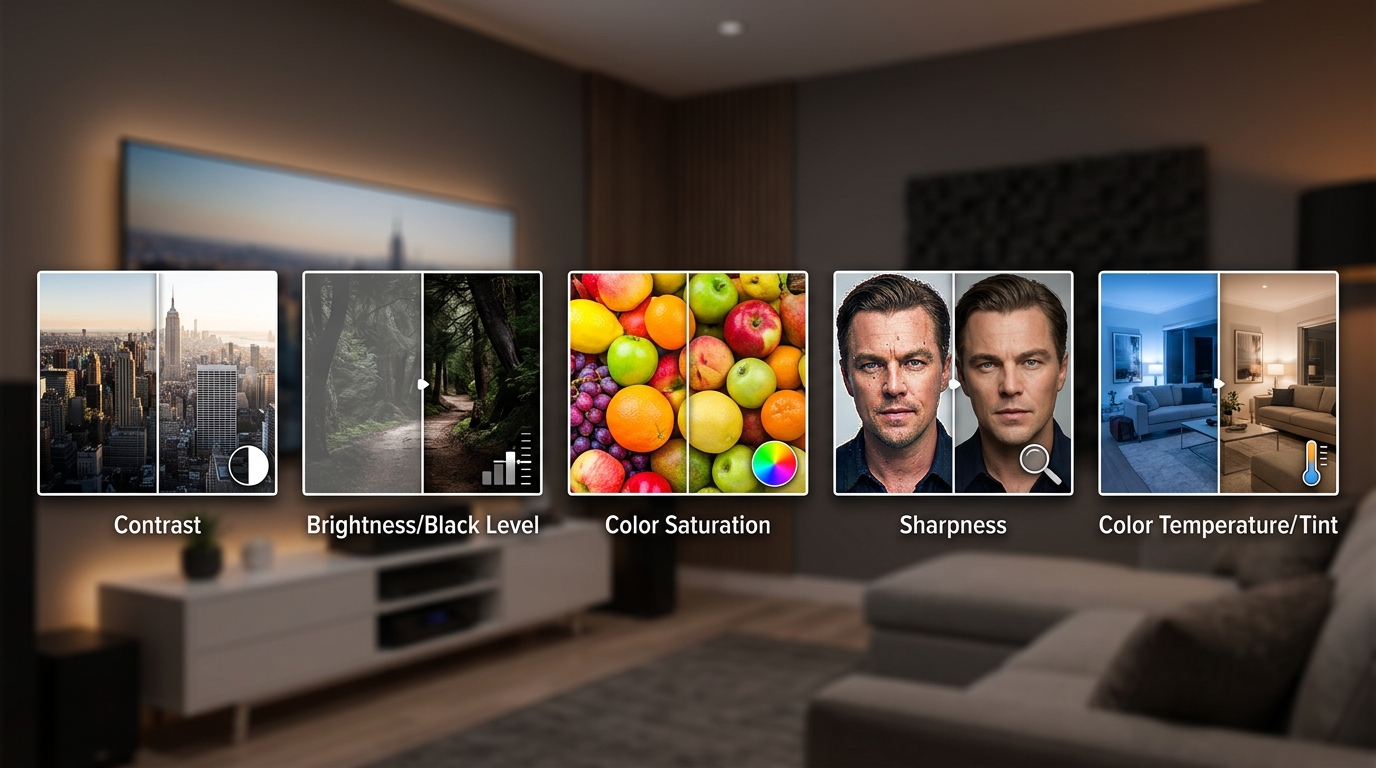
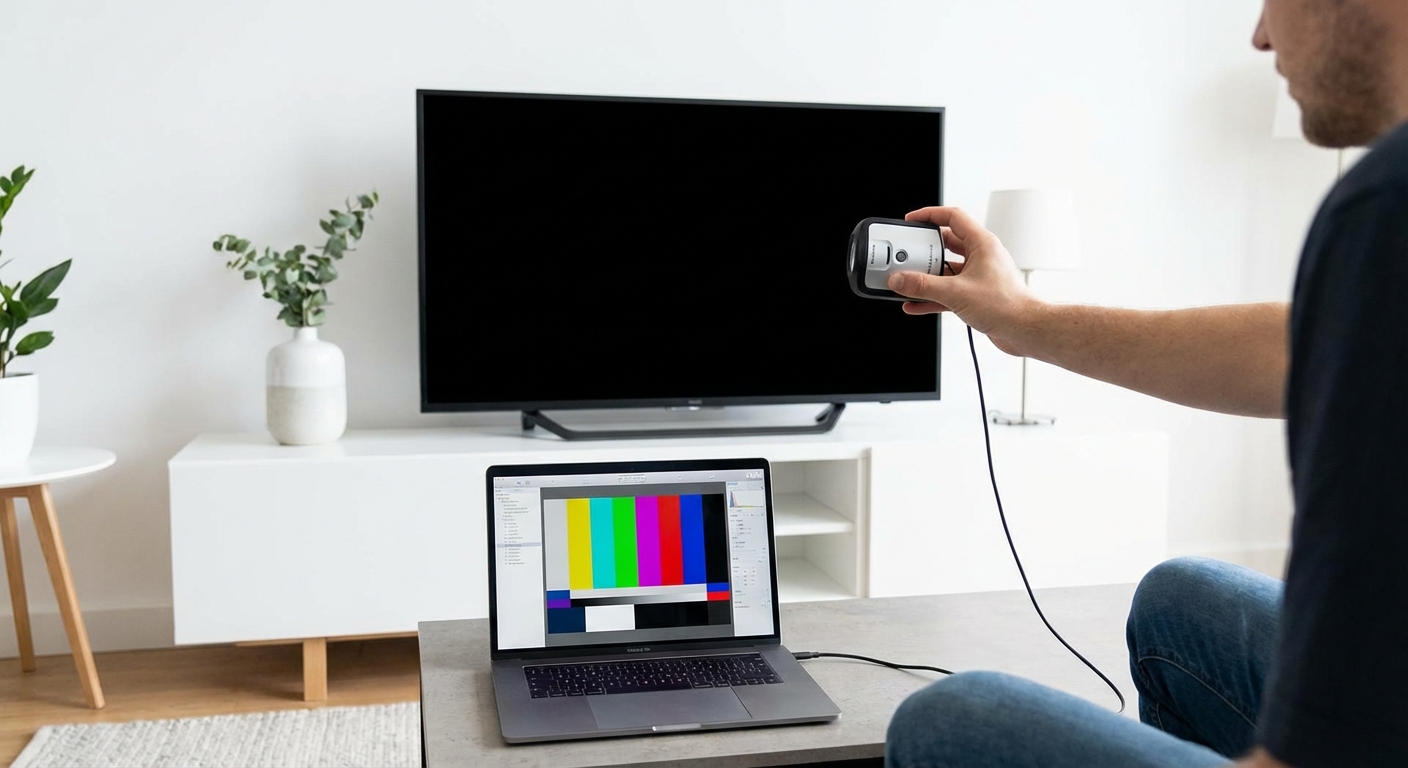
DisplayCAL
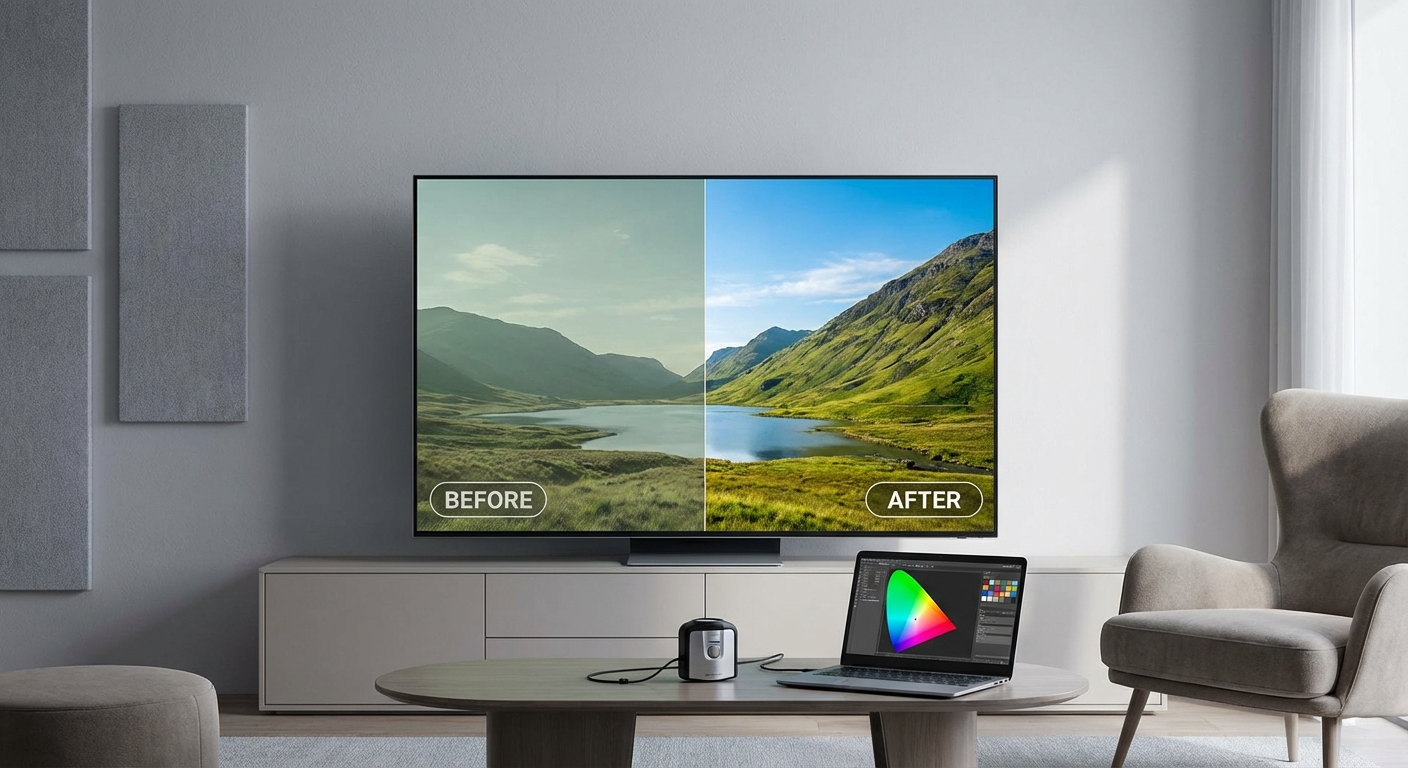
This free, open-source application works with affordable colorimeters like the X-Rite i1Display Pro or Datacolor SpyderX. Together, they let you create custom color profiles for your display.
DisplayCAL generates test patterns, measures how your display reproduces them, then builds a correction profile. The process takes 30-90 minutes depending on how thorough you want to be.
The app handles:
- Brightness and contrast optimization
- Color temperature adjustment
- Gamma curve correction
- Color accuracy verification
You’ll get results comparable to professional calibration for the cost of a colorimeter (around $150-$250). That’s a one-time investment you can use on every display you own.
HCFR (Home Cinema Front Row)
This free Windows application works with several affordable measurement devices. HCFR focuses on measuring grayscale accuracy, color gamut, and gamma response.
The interface shows you exactly where your display deviates from standards like Rec.709 for HD or DCI-P3 for HDR. You adjust your TV’s settings while watching the measurements update in real time.
HCFR pairs well with calibrating TV brightness and contrast because it shows you the actual luminance values, not just what looks good to your eye.
Pattern Generators and Test Apps
AVS HD 709 Calibration Patterns
These free test patterns are available as downloadable files you can play through your media player. They include:
- Brightness and contrast patterns
- Color bars and ramps
- Sharpness and overscan tests
- Geometry and convergence grids
Load them on a USB drive and you have a calibration disc without buying one. The patterns help you dial in basic settings before moving to more advanced app-based measurements.
Spears & Munsil UHD Benchmark
This isn’t free ($40), but it’s the most comprehensive test disc available. The companion app provides detailed instructions for interpreting each pattern and adjusting your display.
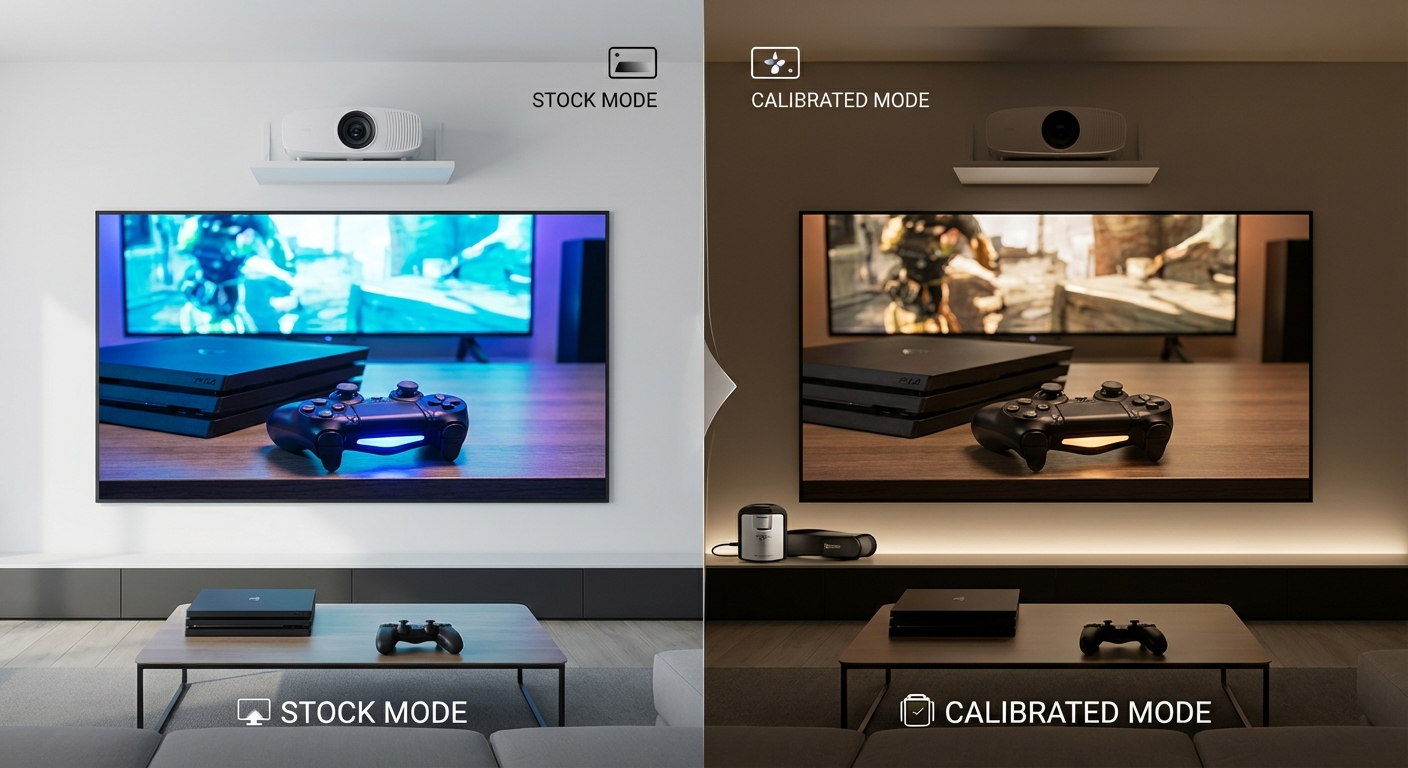
The disc includes HDR patterns, motion resolution tests, and audio channel verification. It’s especially useful for telling if your TV calibration actually improved picture quality because you can return to specific patterns and compare before and after.
Step-by-Step Calibration Process Using Apps
Here’s how to combine multiple apps for complete system calibration:
-
Start with speaker positioning. Use a measuring tape and the AudioTool app to verify each speaker is equidistant from your main listening position. Small differences create timing issues no app can fully correct.
-
Measure room acoustics. Run REW sweeps at your listening position to identify major frequency problems. Look for peaks above 10dB or dips below -10dB. These usually indicate room modes or poor speaker placement.
-
Apply room correction. Use your receiver’s built-in system (Audyssey, Dirac, YPAO) or manual EQ based on REW measurements. Make small adjustments and remeasure to verify improvements.
-
Calibrate video basics. Use AVS HD 709 patterns to set brightness, contrast, and sharpness. These don’t require measurement tools, just your eyes and proper viewing conditions.
-
Fine-tune color accuracy. Run DisplayCAL with a colorimeter to create a custom profile. This step makes the biggest visible difference for color-critical viewing.
-
Verify the results. Play familiar content and compare to how it looked before calibration. Use the Spears & Munsil disc to check specific aspects like motion handling and HDR tone mapping.
Common Calibration Mistakes Apps Help You Avoid
| Mistake | How Apps Help | What to Look For |
|---|---|---|
| Over-boosting bass | REW shows actual frequency response vs target | Peaks above 5dB at subwoofer crossover frequency |
| Incorrect speaker distances | Time-delay measurements reveal mismatches | Phase alignment issues in crossover region |
| Wrong color temperature | HCFR measures actual kelvin value | Deviation from D65 (6500K) standard |
| Crushed blacks or whites | DisplayCAL verifies luminance range | Clipping below 16 or above 235 (video levels) |
| Room correction making things worse | REW before/after comparisons | Increased response variation or new peaks |
Apps give you objective data that prevents common mistakes like setting brightness too high because your room is too bright, or boosting treble because your speakers are aimed wrong.
“The biggest mistake people make is adjusting settings based on one piece of content. Apps let you measure against known standards, so your calibration works for everything you watch, not just that one dark movie or bright sports broadcast.” — Home Theater Calibration Expert
Choosing the Right Apps for Your Setup
Your equipment determines which apps will work best. Here’s a practical breakdown:
If you have a Windows PC and $75 for a microphone: Start with REW for audio. It handles everything from basic speaker setup to advanced room correction verification.
If you’re calibrating on a budget: Use AudioTool on your smartphone for audio analysis and AVS HD 709 patterns for video. Total cost is under $20.
If you want professional video results: Invest in DisplayCAL plus a colorimeter. The $150-$250 total cost pays for itself compared to even one professional calibration visit.
If your receiver has Dirac Live: Use the included app first. It automates most of the process and gives you excellent results without needing to interpret graphs.
If you’re calibrating a projector: Focus on HCFR and DisplayCAL because projectors drift more than TVs. Regular measurements help you catch bulb aging and maintain accuracy. The process works similarly to calibrating projector screen height and throw distance.
When Apps Aren’t Enough
Some situations require professional help even with good apps:
- Severe room acoustic problems. Apps can measure them, but fixing 20dB peaks at 40Hz requires construction, not calibration.
- Complex multi-subwoofer arrays. Time-aligning three or four subs benefits from experience apps can’t provide.
- Professional color-critical work. If you’re grading video for release, invest in professional calibration and verification.
- Troubleshooting equipment problems. Apps show you something is wrong, but diagnosing whether it’s your receiver, cables, or speakers requires different tools.
Apps excel at optimizing working systems. They’re less helpful for diagnosing broken equipment or compensating for fundamental room problems.
Making Calibration Part of Your Routine
Calibration isn’t a one-time task. Your system changes over time:
- Display backlights age and shift color temperature
- Projector bulbs dim and change color balance
- Room acoustics change when you add furniture or move speakers
- Receiver settings get accidentally changed
Set a reminder to remeasure every six months. Keep your calibration files so you can compare new measurements to your baseline. This helps you catch problems early.
For displays, monthly checks of basic settings (brightness, contrast, color temperature) using test patterns takes five minutes. Full recalibration with apps twice a year keeps everything accurate.
Audio systems are more stable. Remeasure when you move speakers, change room layout, or notice something sounds off. Otherwise, annual verification is usually sufficient unless you’re dealing with auto-calibration issues.
Getting Started Without Feeling Overwhelmed
Pick one app and master it before adding others. Start with the easiest improvement for your system:
- If dialogue sounds unclear: Use AudioTool to verify your center channel level and check for frequency response problems around 2-4kHz.
- If colors look wrong: Download AVS HD 709 patterns and adjust your TV’s color temperature setting. This free fix often makes the biggest visible difference.
- If bass sounds boomy: Run REW measurements to identify which frequencies are peaking. Even without correction, knowing the problem frequencies helps you understand what you’re hearing.
Each app teaches you something about how your system works. That knowledge makes the next calibration easier and helps you make better decisions when choosing TV calibration settings.
Building Your Calibration Toolkit
Here’s a realistic budget progression:
Free start: AVS HD 709 patterns, AudioTool app trial, your smartphone camera for checking screen uniformity.
$75 audio upgrade: Add a UMIK-1 microphone and REW software. This combination handles 90% of audio calibration tasks.
$150 video upgrade: Add a basic colorimeter and DisplayCAL. Your displays will finally show colors as intended.
$250 complete kit: Quality colorimeter, calibrated measurement microphone, all the free software, and the Spears & Munsil disc for verification.
That $250 total investment gives you calibration capabilities that would have cost $5,000+ in professional equipment a decade ago. You can use these tools on every display and audio system you own, making the per-device cost negligible.
Turning Measurements Into Better Performance
Apps are measurement tools, not magic fixes. They show you problems. You still need to fix them through proper setup, room treatment, or equipment adjustment.
The real value isn’t the apps themselves. It’s the understanding you gain by seeing how changes affect measurements. You learn which settings actually matter and which are marketing features that make things worse.
That knowledge makes you better at setting up any system, even without apps. You develop an ear for frequency imbalances and an eye for color shifts. The apps train you to recognize what correct looks and sounds like.
Start with one app today. Measure your current system. You’ll be surprised what you find, and you’ll finally have the data you need to make improvements that actually work.


Leave a Reply