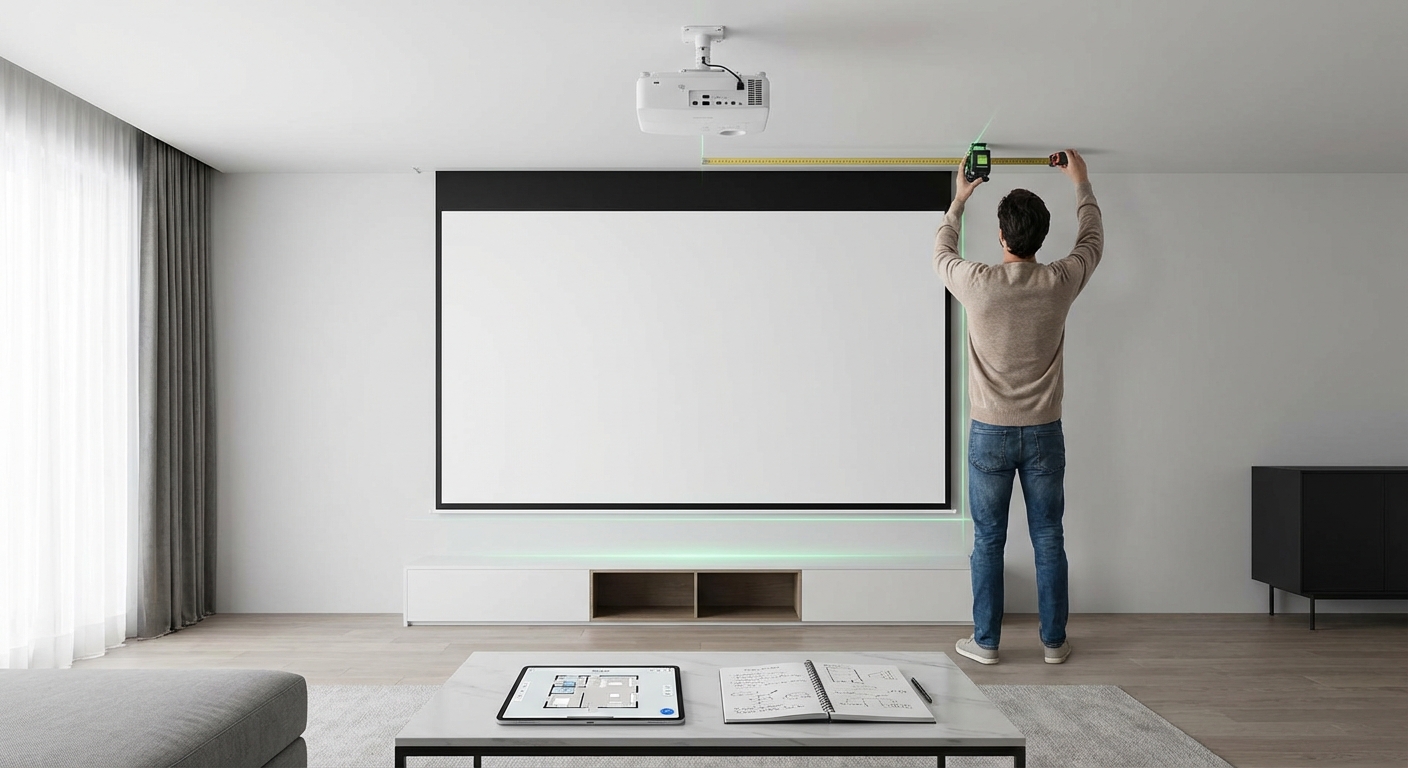
Setting up a projector for the first time feels like solving a puzzle. You know the screen needs to go on one wall and the projector somewhere behind the couch, but the exact numbers? That’s where most people get stuck. A projector screen distance calculator takes the guesswork out of placement by giving you precise measurements based on your projector’s specs and your room dimensions.
A projector screen distance calculator uses your projector’s throw ratio to determine exactly where to mount your projector and screen. You’ll need your projector model, desired screen size, and room measurements. Most calculators provide throw distance, screen height, and ideal seating positions. This eliminates trial and error, prevents costly mounting mistakes, and ensures your image fills the screen perfectly without distortion or cropping.
What a Projector Screen Distance Calculator Actually Does
A projector screen distance calculator solves three core problems at once.
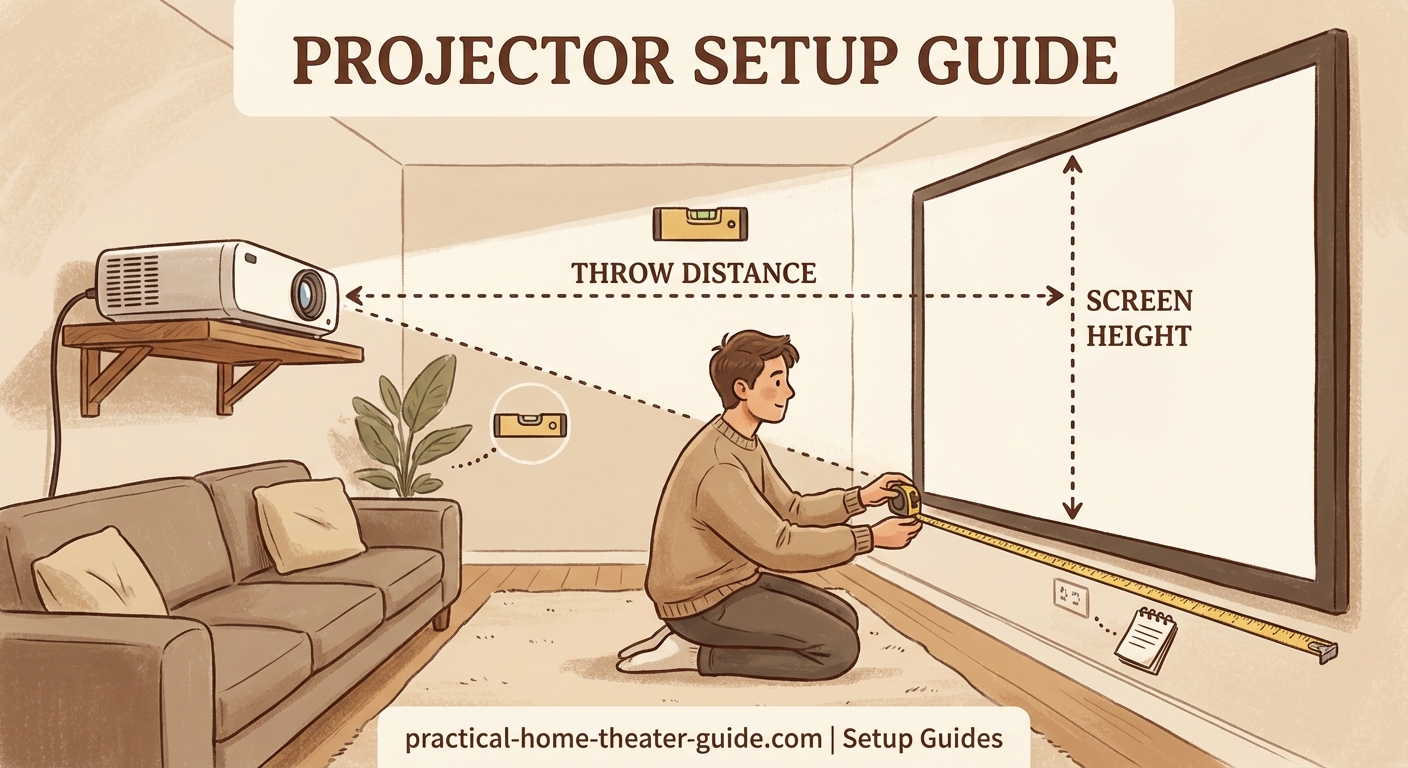
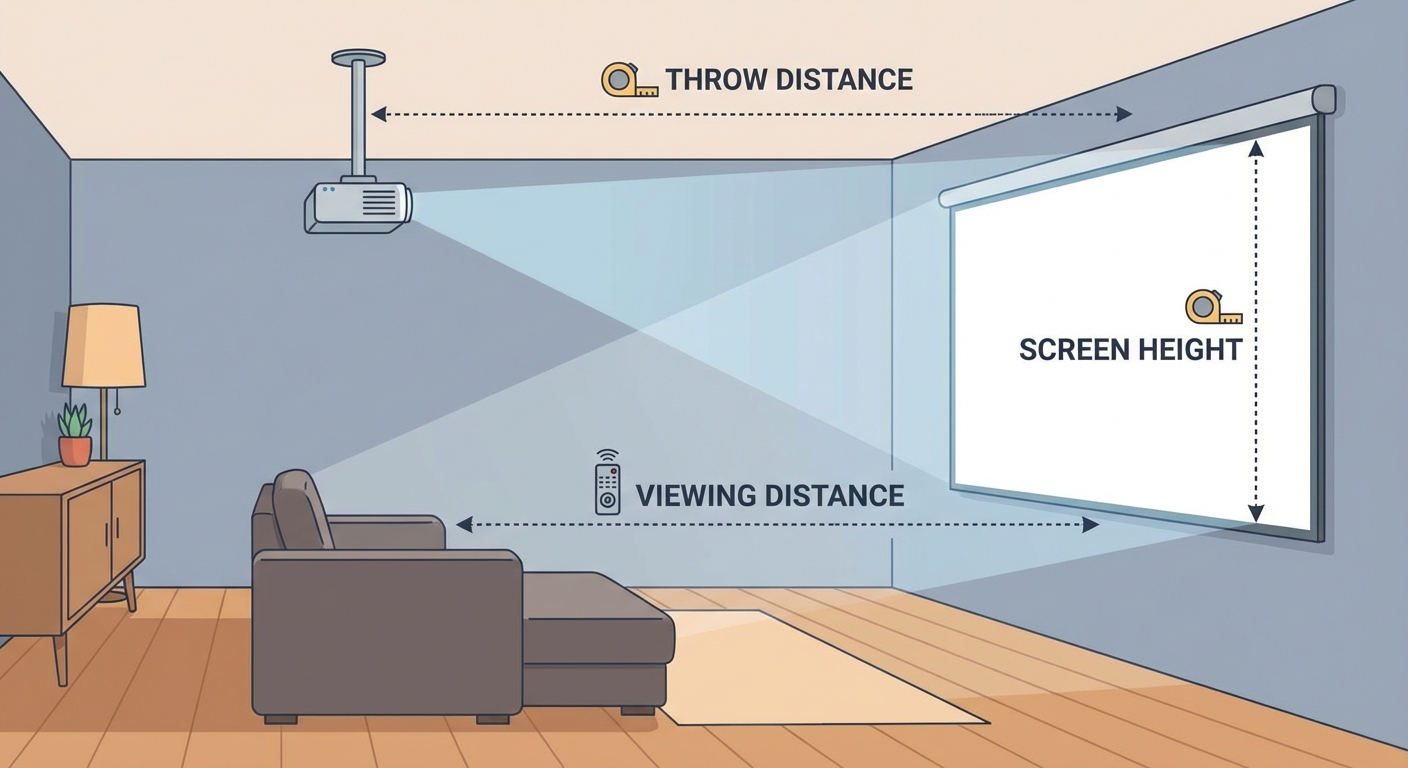
First, it tells you how far back your projector needs to sit from the screen to create your desired image size. This measurement is called throw distance.
Second, it calculates the exact screen dimensions you’ll get at different distances. Want a 120-inch diagonal? The calculator shows you the width and height in inches.
Third, it recommends optimal seating positions based on screen size and resolution. Sitting too close to a 1080p image reveals pixels. Sitting too far from a 4K screen wastes detail.
The calculator uses your projector’s throw ratio, which is a fixed specification built into the lens system. A projector with a 1.5:1 throw ratio needs to sit 15 feet back to create a 10-foot-wide image. Change the distance, and the image size changes proportionally.
Most online calculators let you search by projector brand and model. The tool pulls the throw ratio from a database and runs the math for you. No manual calculations needed.
How Throw Ratio Controls Your Setup Options
Throw ratio is the single most important number for projector placement.
It’s expressed as a ratio like 1.2:1 or 0.5:1. The first number represents throw distance. The second represents image width. A 2.0:1 throw ratio means the projector sits two feet back for every one foot of screen width.
Here’s how different throw ratios change your setup:
- Long throw (1.5:1 to 3.0:1): Traditional projectors that mount on the ceiling or back wall. Common in dedicated home theaters with 12+ feet of depth.
- Standard throw (1.0:1 to 1.5:1): Balanced option for living rooms. Mounts mid-ceiling or on a shelf 8 to 12 feet back.
- Short throw (0.4:1 to 1.0:1): Sits just a few feet from the screen. Good for small rooms or when you can’t ceiling mount.
- Ultra short throw (0.25:1 or less): Sits inches from the wall or directly on a media console. Eliminates shadows and ceiling work.
Your room depth determines which throw ratio works. Measure from your screen wall to the back wall. Subtract two feet for walking space. That’s your maximum throw distance.
If you’re working with limited space, understanding how to calculate projector throw distance for your room size helps you pick the right projector type before you buy.
Step-by-Step Process for Using a Distance Calculator
Here’s how to use any projector screen distance calculator effectively.
-
Find your projector’s throw ratio. Check the manufacturer’s spec sheet or manual. Look for “throw ratio” or “projection ratio.” Some projectors list a range like 1.4:1 to 2.2:1 because they have zoom lenses.
-
Measure your available space. Use a tape measure to record the distance from your screen wall to the farthest point where the projector can sit. Measure ceiling height if you’re mounting overhead.
-
Enter your target screen size. Most calculators ask for diagonal measurement in inches. Common sizes are 100″, 120″, or 150″. If you’re unsure, think about what feels right for your seating distance.
-
Review the output. The calculator shows throw distance, screen width, screen height, and sometimes lens shift requirements. Write these numbers down.
-
Verify seating distance. Good calculators include a recommended viewing distance range. For 4K content, you can sit closer. For 1080p, you need more distance to avoid seeing pixels.
-
Check vertical placement. Some tools calculate how high to mount the screen based on eye level when seated. This prevents neck strain during long movies.
The biggest mistake people make is choosing a screen size before checking if their projector can actually fill it from their available throw distance. Always run the calculator before buying a screen.
Reading and Applying Calculator Results
Calculator outputs look different depending on the tool, but they all provide the same core data.
Throw distance is listed in feet and inches or meters. This is where the projector lens needs to sit, measured from the screen surface. Add a few inches of buffer for fine-tuning during installation.
Screen dimensions show width and height separately. A 120-inch diagonal 16:9 screen measures roughly 104 inches wide by 59 inches tall. Knowing the exact dimensions helps you pick the right screen model or paint the right area.
Offset or lens shift tells you if the projector needs to sit above, below, or level with the screen center. Projectors with lens shift let you adjust the image position without moving the unit. Models without lens shift must be perfectly aligned.
Viewing distance recommendations usually give a range. For a 120-inch 4K screen, you might see 10 to 15 feet as optimal. Closer than 10 feet feels overwhelming. Farther than 15 feet loses immersion.
Some calculators include brightness recommendations. A 2,000-lumen projector works fine for a 100-inch screen in a dark room but struggles with 150 inches unless you control ambient light.
Common Calculator Scenarios and Solutions
Different room layouts create different challenges. Here’s how to handle the most common situations.
| Scenario | Problem | Solution |
|---|---|---|
| Small living room (10×12 feet) | Not enough throw distance for standard projector | Use ultra short throw projector or mount on back wall with wide-angle lens |
| Long narrow room (12×20 feet) | Too much throw distance for desired screen size | Choose long throw projector or move seating forward |
| Low ceiling (7.5 feet) | Projector blocks viewer’s line of sight | Use short throw model on media console or shelf mount instead of ceiling |
| Open concept space | No back wall for rear mounting | Install ceiling mount with adjustable arm or use portable tripod stand |
| Existing TV wall | Screen needs to fit specific wall section | Enter maximum width into calculator and let it determine screen size |
If your room doesn’t fit standard setups, you have two options. Adjust the screen size to match your available throw distance. Or choose a different projector with a throw ratio that fits your space.
Many people assume bigger is always better. But a 150-inch screen in a 12-foot room creates eye strain. The calculator’s seating recommendation exists for a reason.
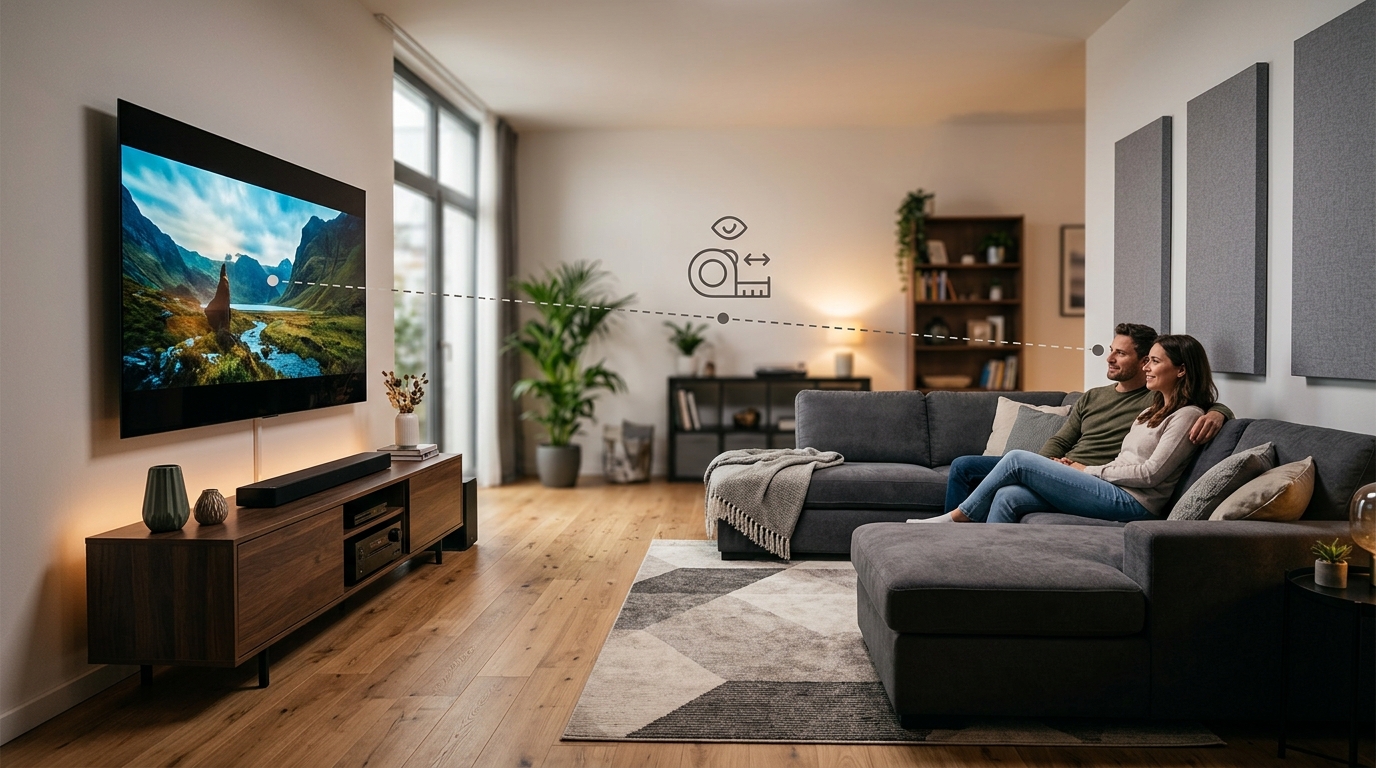
Seating Distance and Screen Size Relationships
Screen size and seating distance work together to create the right viewing experience.
The general rule for 4K projectors: sit 1.0 to 1.5 times the screen width away. For a 100-inch wide screen (roughly 87 inches actual width), that’s 7 to 11 feet.
For 1080p projectors: sit 1.5 to 2.5 times the screen width away. The lower resolution needs more distance to hide pixels.
Here’s a practical reference:
- 80-inch screen: Seat viewers 6 to 10 feet back (4K) or 8 to 13 feet back (1080p)
- 100-inch screen: Seat viewers 7 to 12 feet back (4K) or 10 to 16 feet back (1080p)
- 120-inch screen: Seat viewers 9 to 14 feet back (4K) or 12 to 19 feet back (1080p)
- 150-inch screen: Seat viewers 11 to 17 feet back (4K) or 15 to 24 feet back (1080p)
These ranges account for personal preference. Some people like an immersive, theater-style experience and sit closer. Others prefer a relaxed view and sit farther back.
If you’re also setting up a TV in another room, the same distance principles apply. You can reference how to choose the right TV size for your room distance to keep your viewing experiences consistent across spaces.
Screen Height and Vertical Positioning Guidelines
Horizontal distance gets most of the attention, but vertical placement matters just as much.
The center of your screen should sit at eye level when you’re seated. For most people, that’s 36 to 42 inches from the floor.
Measure from your couch cushion to your eye level while sitting normally. Add that measurement to the floor height. That’s your screen center point.
If your projector has vertical lens shift, you can mount it on the ceiling and shift the image down to the correct height. This keeps the projector out of the way and eliminates shadows.
Projectors without lens shift require physical angling. Tilt the projector down to hit the screen, then use keystone correction to square up the image. Keystone works, but it reduces image quality by digitally warping pixels.
Avoid mounting the screen too high. A screen with its center at 60 inches forces viewers to tilt their heads up for two-hour movies. That creates neck fatigue.
If you’re ceiling mounting, calculate the angle carefully. A projector 10 feet back and 8 feet up pointing at a screen 4 feet off the floor creates a steep angle that may exceed the projector’s keystone correction range.
Accounting for Zoom Range and Lens Options
Many projectors include zoom lenses that adjust the image size without moving the unit.
A 1.2x zoom lens lets you increase or decrease the image size by 20% from a fixed position. A projector with a 1.5:1 to 1.8:1 throw ratio can create a 100-inch image from anywhere between 12.5 and 15 feet back.
Zoom gives you flexibility during installation. Mount the projector in the most convenient spot, then zoom to fill the screen. This is especially helpful in rooms where exact placement is limited by ceiling joists or ductwork.
Some calculators ask if your projector has zoom. If yes, they’ll show a throw distance range instead of a single number. Pick any distance within that range.
Prime lenses (no zoom) require exact placement. You get better image quality because prime lenses have fewer glass elements, but you lose flexibility. Measure twice, mount once.
Interchangeable lens projectors let you swap lenses to change throw ratio. A single projector body can work in different rooms by switching between standard, short, and long throw lenses. These systems cost more but offer maximum adaptability.
Dealing with Ambient Light and Screen Gain
Calculator results assume a dark room, but most living rooms have windows and lamps.
Screen gain affects how bright the image appears. A 1.0 gain screen reflects light evenly in all directions. A 1.3 gain screen focuses light back toward viewers, making the image brighter from the seating area.
Higher gain helps in rooms with ambient light, but it narrows the viewing angle. Sit too far off-center, and the image looks dim.
Some calculators include a brightness field where you enter your projector’s lumen output. The tool then recommends maximum screen size for your lighting conditions.
As a baseline, you need roughly 15 to 20 lumens per square foot of screen area in a dark room. In a room with moderate ambient light, bump that to 30 to 40 lumens per square foot.
A 2,500-lumen projector works well for a 120-inch screen in a dark room. The same projector struggles with a 150-inch screen unless you add blackout curtains or wait until evening.
If light control is difficult, consider a higher gain screen or an ambient light rejecting (ALR) screen. ALR screens filter out ceiling light while preserving projector light, making daytime viewing possible.
Using Calculators for Outdoor and Temporary Setups
Projector screen distance calculators work just as well for outdoor movie nights and portable setups.
Outdoor screens face different challenges. Wind moves inflatable screens. Uneven ground makes tripod placement tricky. Extension cords limit projector position.
Run the calculator first to know your ideal throw distance. Then scout your yard or patio to find a flat surface at that distance from the screen location. A picnic table, deck railing, or temporary stand all work.
Outdoor projectors need higher brightness. Ambient light from streetlights, porch lights, and twilight washes out dim images. Aim for 3,000+ lumens for outdoor use.
Temporary indoor setups benefit from calculators too. Basement movie nights, classroom presentations, and rental event spaces all need proper projector placement. Knowing the throw distance in advance means you bring the right cables and stands.
For portable projectors, measure the throw distance at home, then replicate it at your destination. Use painter’s tape to mark the projector and screen positions. This makes setup faster and ensures the image fills the screen correctly.
Correcting Common Measurement Mistakes
Even with a calculator, measurement errors create problems.
The most common mistake is measuring from the wrong reference point. Throw distance measures from the lens to the screen surface, not from the back of the projector body. A projector with a 6-inch body adds 6 inches to your total mounting depth.
Another error is forgetting to account for screen borders. A 120-inch screen frame might measure 125 inches diagonally with the border included. Use the active image area, not the frame size.
Ceiling height measurements trip people up. Measure from the floor to the ceiling where the projector will actually mount, not at the room’s highest point. Vaulted ceilings create variations.
If your calculator result doesn’t match your test projection, recheck these points:
- Did you enter the correct throw ratio?
- Did you measure throw distance from the lens or the mount point?
- Is your projector set to the correct aspect ratio (16:9 vs 16:10)?
- Did you account for lens shift or offset?
Small errors compound. A 2-inch measurement mistake becomes a 10-inch image size error with a long throw projector.
Integrating Calculator Results with Room Acoustics
Projector placement affects more than just the image.
Ceiling-mounted projectors sit near the primary seating area. That’s also where you want overhead or side surround speakers. Plan both systems together to avoid conflicts.
A projector mounted 10 feet back and 8 feet up might block the ideal position for rear surround speakers. You’ll need to offset the speakers or use wireless models.
The projector’s fan noise matters too. Loud projectors create a constant hum during quiet movie scenes. Position the projector where fan noise won’t overpower dialogue. Adding acoustic panels to the ceiling above the projector helps absorb sound.
If you’re running cables for the projector, consider running speaker wire at the same time. Learning how to run speaker wire through walls without damaging your home saves you from opening walls twice.
Room acoustics also affect perceived image quality. A room with hard surfaces and lots of echo feels less immersive, even with a perfectly placed projector. Addressing how to stop echo and reverb ruining your home theater sound creates a better overall experience.
Comparing Calculator Tools and Choosing the Best One
Dozens of projector calculators exist online. They all do the same basic math, but features vary.
Look for calculators that include a projector database. Entering your exact model pulls accurate throw ratios without manual lookup. This prevents errors from mistyped specs.
The best calculators show multiple results at once. You can compare a 100-inch, 120-inch, and 150-inch screen side by side to see which fits your room best.
Some tools generate diagrams showing the projector, screen, and seating positions to scale. These visual layouts help you spot problems before mounting anything.
Advanced calculators include lens shift ranges, zoom ranges, and offset calculations. If your projector has these features, use a calculator that accounts for them.
Manufacturer calculators (Epson, BenQ, Sony) work well for their own projectors but may not include competitor models. Third-party tools like Projector Central offer broader databases.
Mobile apps exist too. They’re handy for on-site measurements when shopping for projectors or screens in person.
Planning for Future Upgrades and Changes
Your first projector probably won’t be your last.
When using a calculator, note the throw distance and screen size that work for your room. Future projectors should have similar throw ratios to use the same mounting position.
If you’re installing a ceiling mount, use a universal mount with adjustable arms. This accommodates projectors with different lens positions without reinstalling the mount.
Conduit or cable raceways make future upgrades easier. Running HDMI cables through the ceiling is tedious. Running them through conduit means you can pull new cables later without opening drywall.
Screen size is harder to change. Painted screens require repainting. Fixed-frame screens need new frames. Retractable screens are easier to swap but cost more upfront.
If you think you’ll upgrade to 4K or 8K later, plan seating distance for the higher resolution now. You can sit closer to a 4K screen than a 1080p screen of the same size. Building in that flexibility prevents furniture rearrangement later.
Getting the Most from Your Calculated Setup
Once the calculator gives you numbers, the real work begins.
Use a laser measure for accuracy. Tape measures sag over long distances. Laser measures give you exact throw distance in seconds.
Mark your mounting points with painter’s tape before drilling. Project a test image from a temporary position to verify alignment. Adjust as needed, then drill.
Keep a copy of your calculator results. Screenshot the output or write down the key numbers. You’ll reference them when adjusting zoom, focus, or lens shift.
Test the setup at different times of day. Morning light through east windows affects image quality differently than afternoon light through west windows. Adjust curtains or screen position accordingly.
Calibration matters too. A perfectly positioned projector still needs color and brightness adjustments. While projector calibration differs from TV calibration, many principles overlap. If you’ve worked through how to calibrate your TV in 30 minutes without hiring a professional, you’ll recognize similar settings for contrast, brightness, and color temperature.
Making Your Projector Setup Work for You
A projector screen distance calculator removes the guesswork from home theater planning. You get exact numbers based on your specific projector and room dimensions. No more trial and error with temporary setups or costly mounting mistakes.
The calculator tells you where to put the projector, how big the screen will be, and where to sit for the best view. It accounts for throw ratio, zoom range, and seating distance. It helps you avoid common mistakes like mounting too close, choosing an oversized screen, or placing seating too far back.
Run the calculator before you buy a screen. Run it again before you drill mounting holes. Keep the results handy for future adjustments. The 15 minutes you spend with a calculator saves hours of frustration and hundreds of dollars in returns or remounts.
Your room has a perfect projector position. The calculator finds it for you.


Leave a Reply