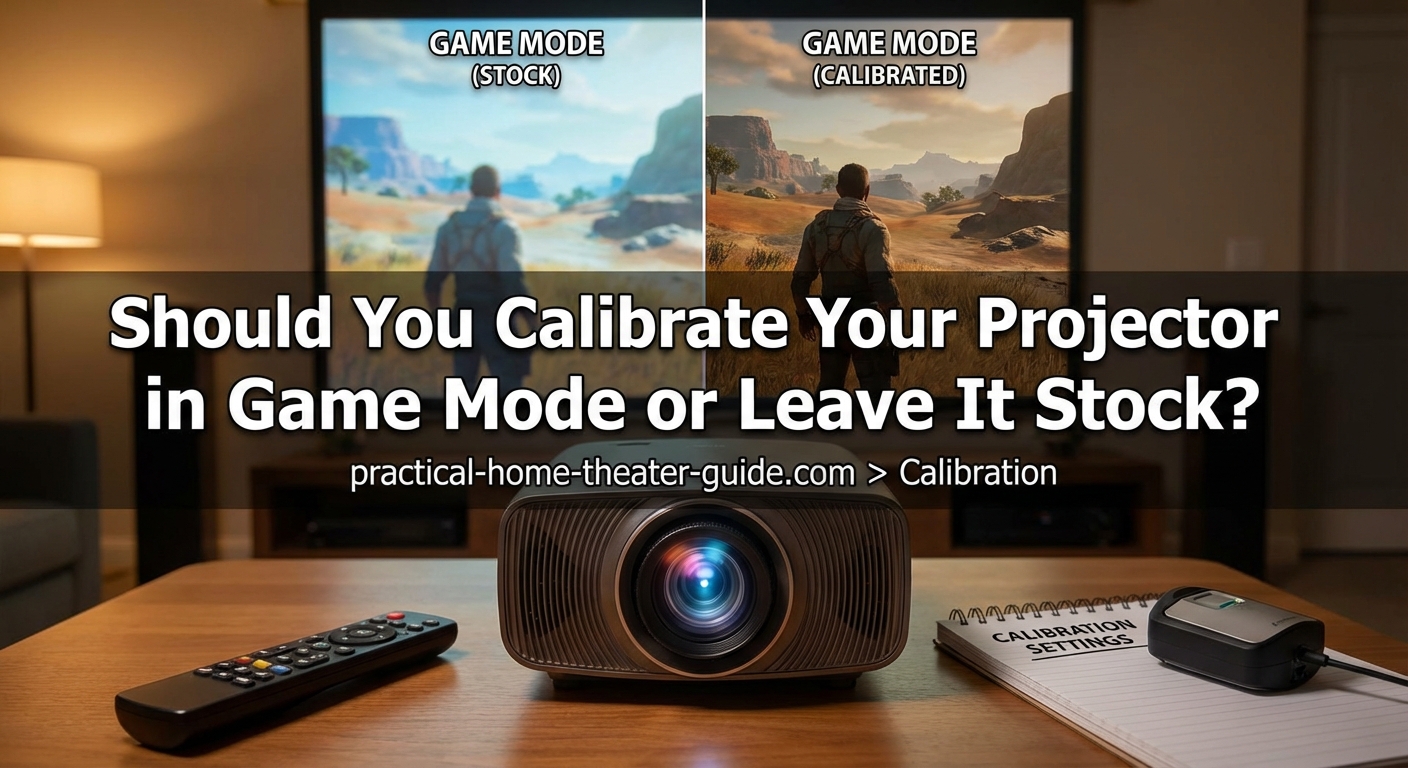
You’ve invested in a gaming projector, switched to game mode for lower input lag, and now the image looks washed out or oversaturated. The question hits hard: should you calibrate projector in game mode settings or trust the factory defaults?
Most gamers assume game mode is a take-it-or-leave-it preset. That’s not true. Game mode can be calibrated, and doing so often delivers both responsive gameplay and accurate colors. The real question is whether you need professional help or can handle it yourself.
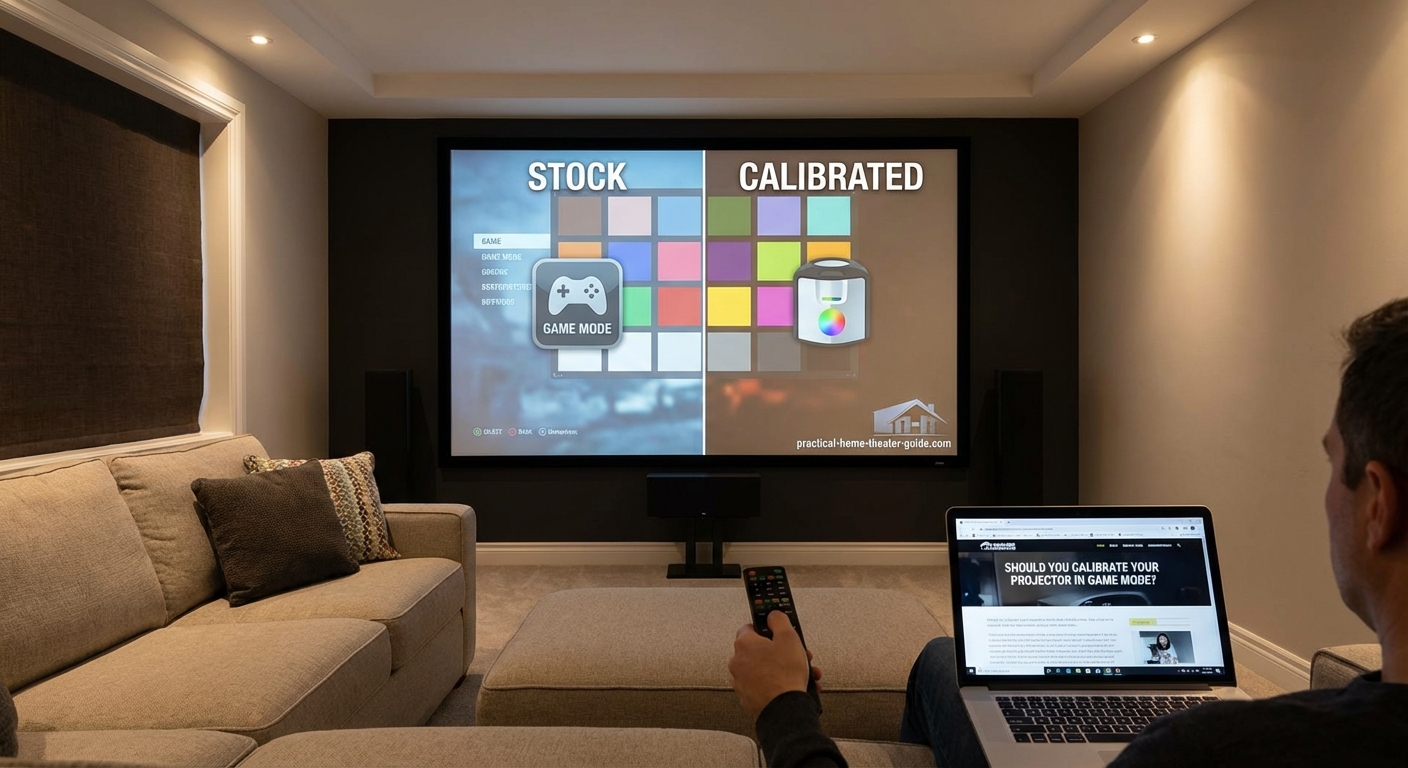
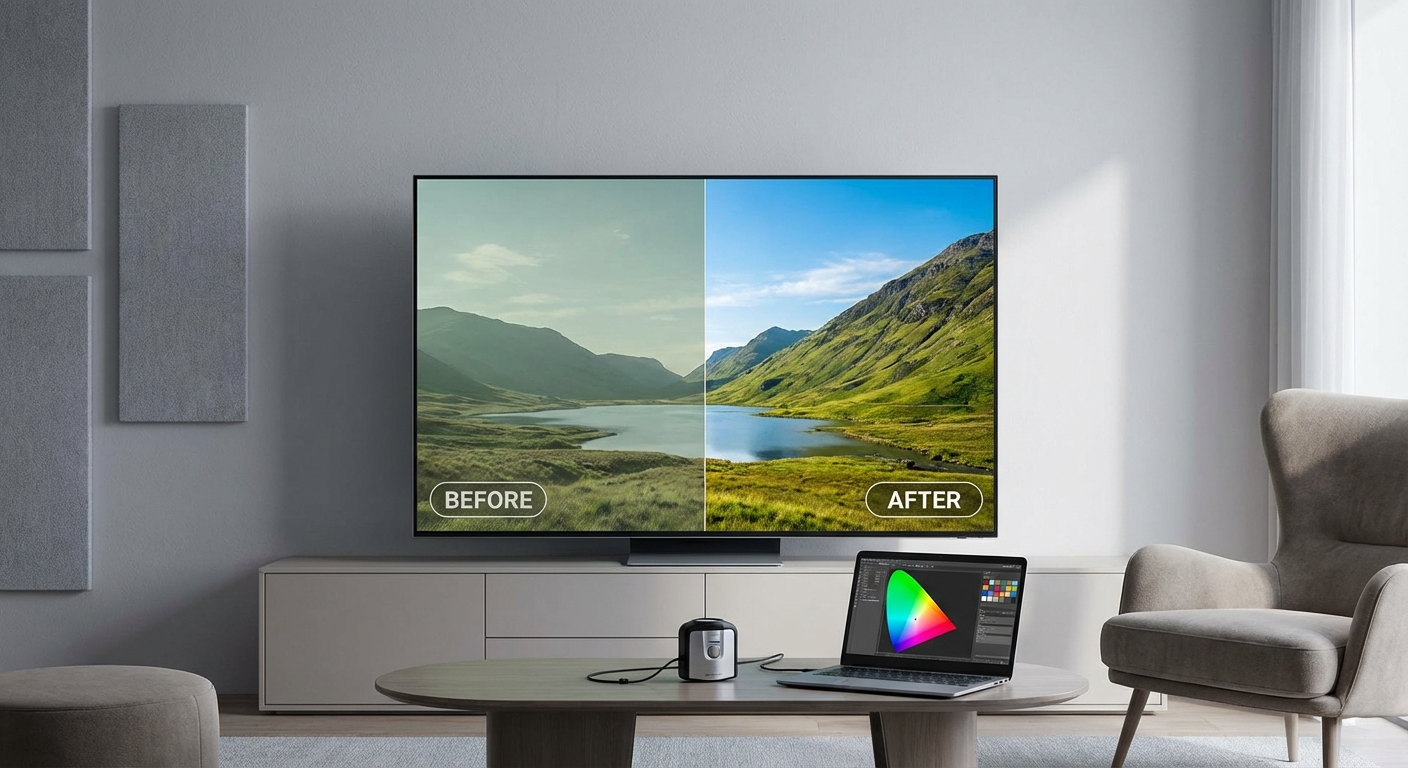
Game mode can and should be calibrated for better color accuracy without sacrificing input lag. Basic adjustments like brightness, contrast, and color temperature take 20 minutes and improve picture quality dramatically. Professional calibration is optional but worthwhile if you want reference-level accuracy. Stock game mode settings prioritize speed over image fidelity, leaving significant room for improvement.
Why game mode exists and what it sacrifices
Game mode disables video processing features that add delay between your controller input and the screen response. Features like motion smoothing, advanced color processing, and noise reduction get turned off or simplified.
The result is lower input lag, usually between 16ms and 40ms depending on your projector model. That’s essential for competitive gaming where every millisecond counts.
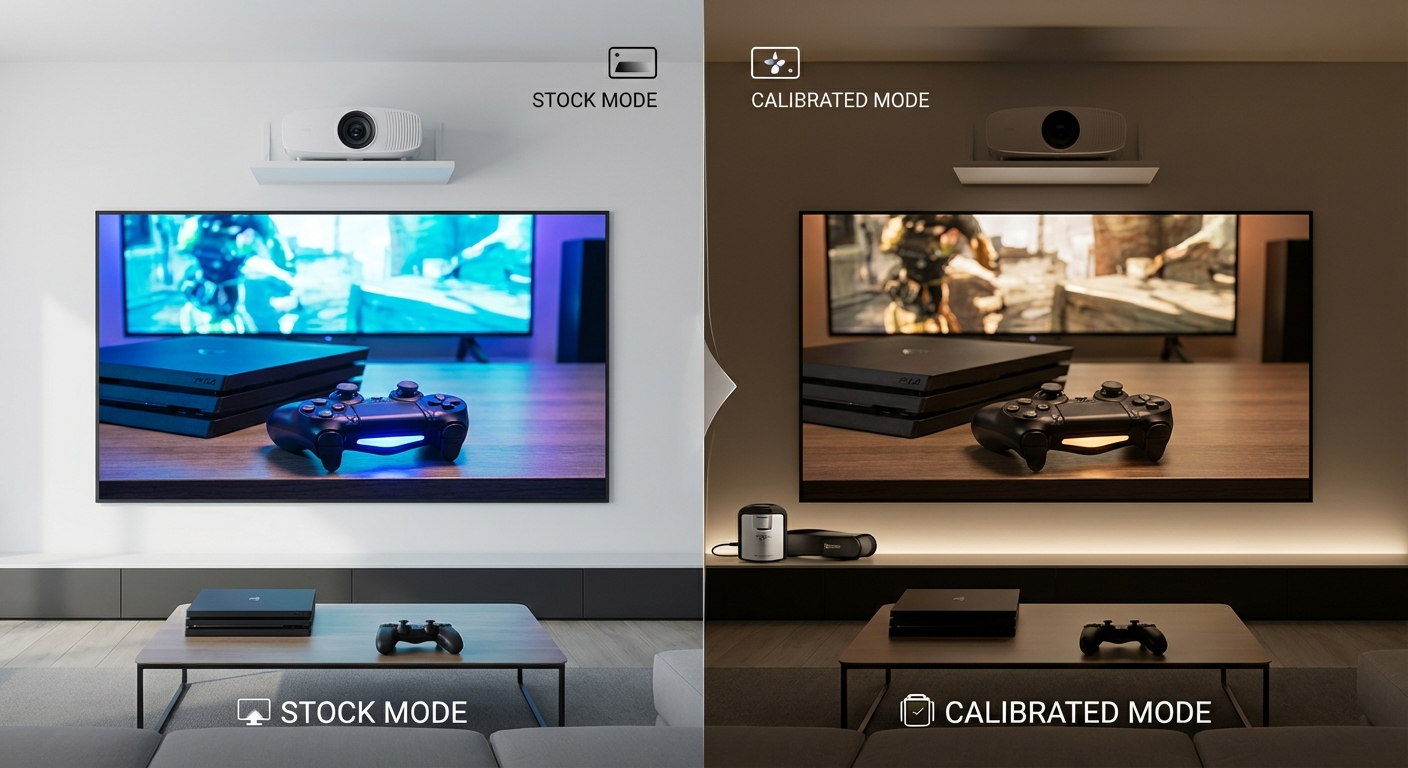
But here’s the cost. Most manufacturers tune game mode for brightness and punch, not accuracy. Colors shift toward oversaturation. Black levels rise. White balance drifts cool or warm. The image becomes serviceable but far from ideal.
Leaving game mode stock means accepting these compromises. Calibrating game mode means fixing them without re-enabling the processing features that caused lag in the first place.
What calibration actually changes in game mode
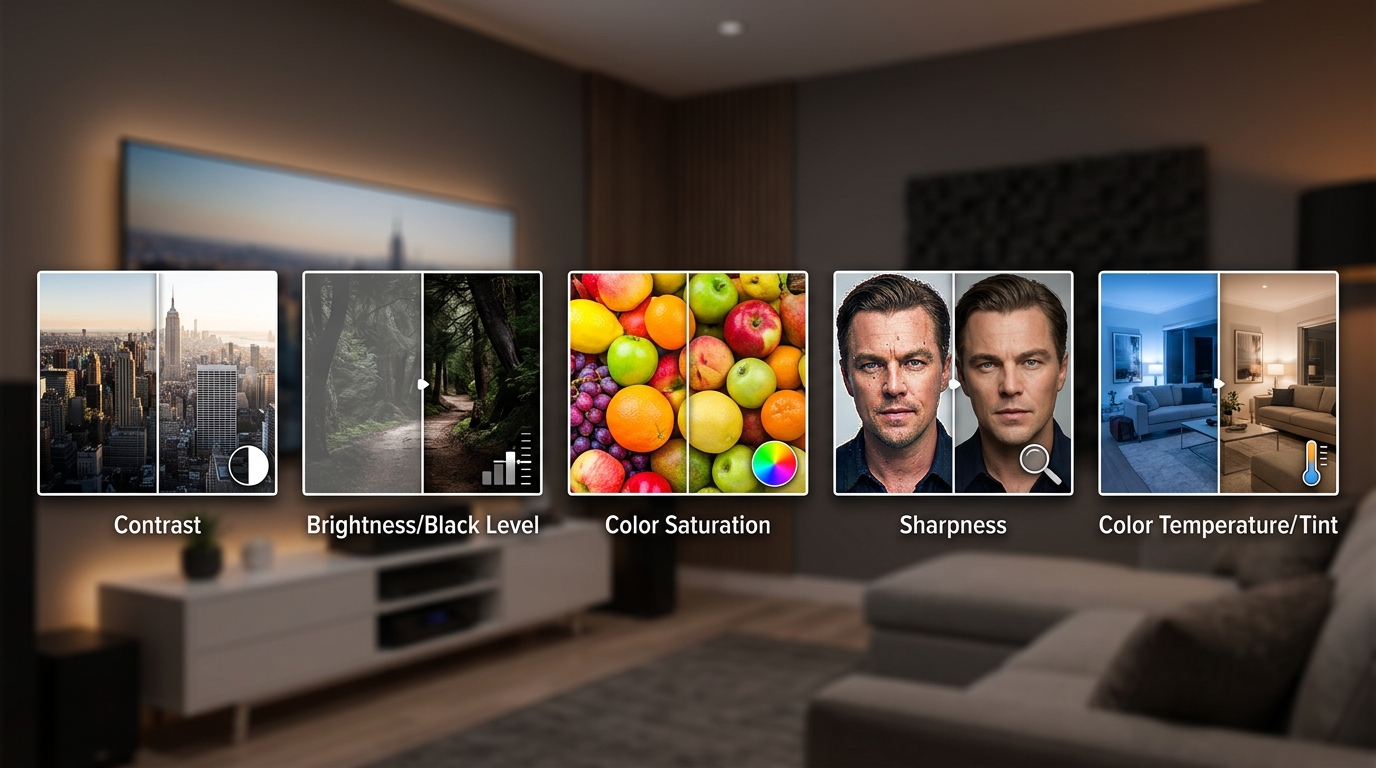
Calibration adjusts the controls that remain active in game mode. You’re not turning features back on. You’re refining the settings that still function.
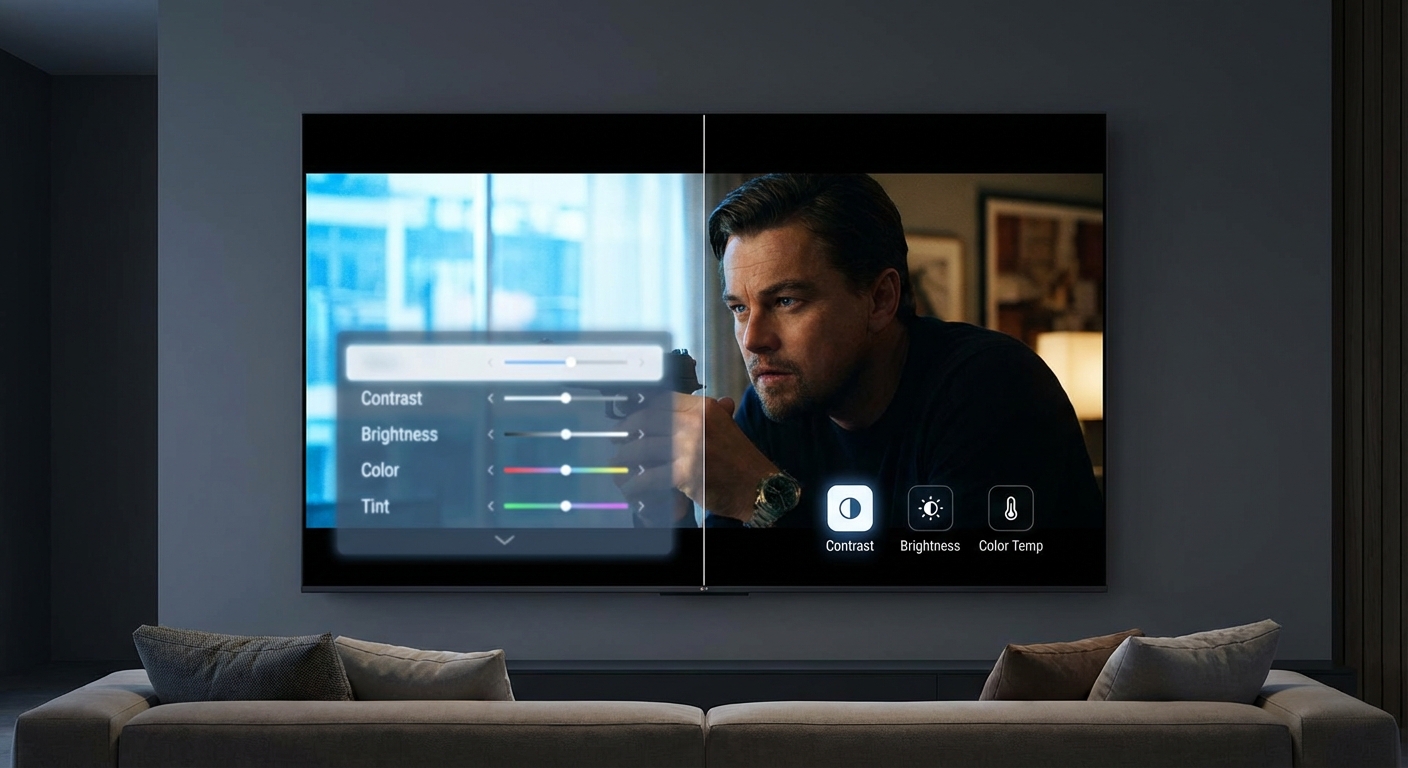
Here’s what you can adjust:
- Brightness (black level)
- Contrast (white level)
- Color saturation
- Tint (hue)
- Color temperature (white balance)
- Gamma curve
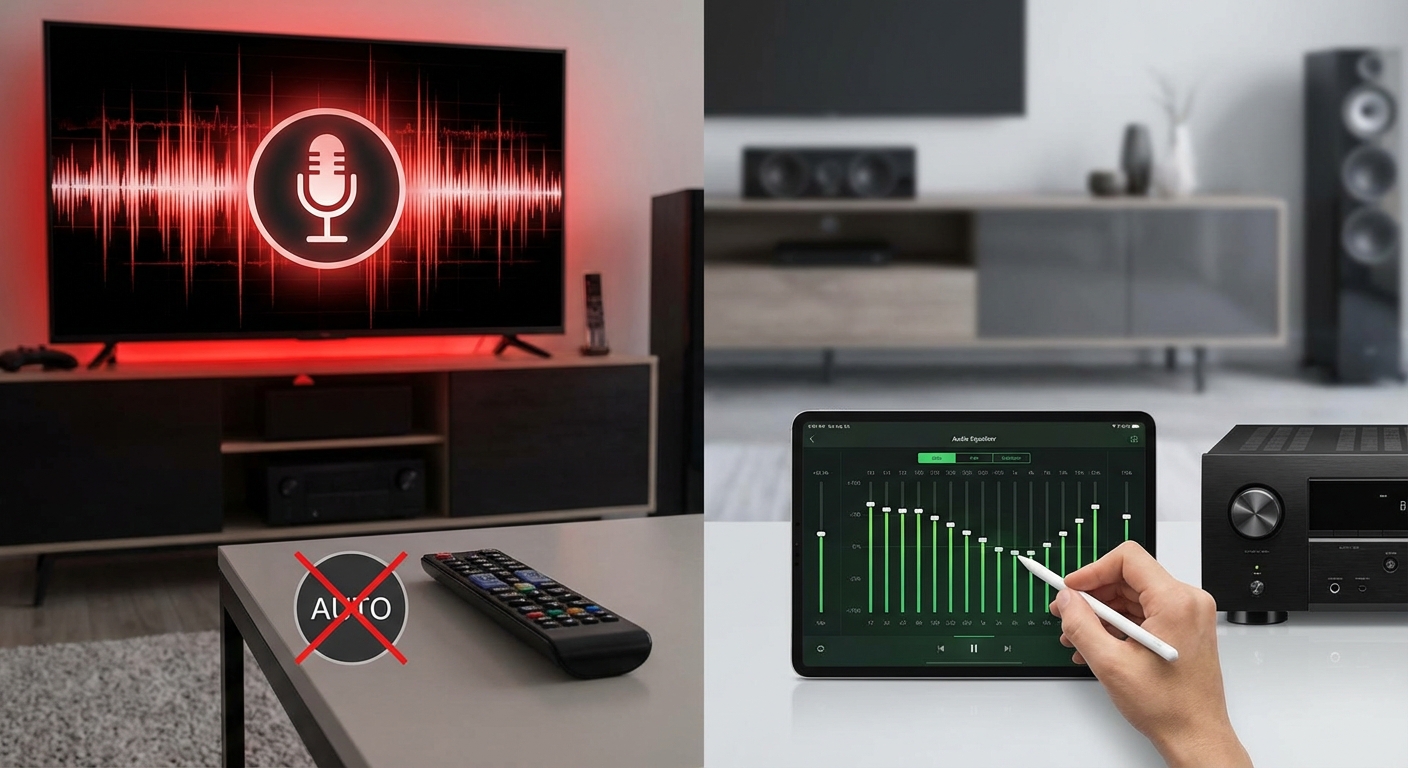
- Individual color management (red, green, blue, cyan, magenta, yellow)
These controls don’t add processing delay. They alter how the projector interprets and displays the video signal. Adjusting them improves accuracy without increasing input lag.
Some projectors also allow sharpness adjustments in game mode. Be careful here. Too much sharpness adds edge enhancement, which can introduce slight processing delays. Keep sharpness at zero or just above.
The difference between basic and professional calibration
Basic calibration uses test patterns and your own eyes. You adjust brightness until black bars are just visible, contrast until white highlights don’t clip, and color temperature until grays look neutral.
This takes about 20 to 30 minutes. You’ll need test patterns from a Blu-ray disc, streaming service, or free online source. The improvements are noticeable immediately.
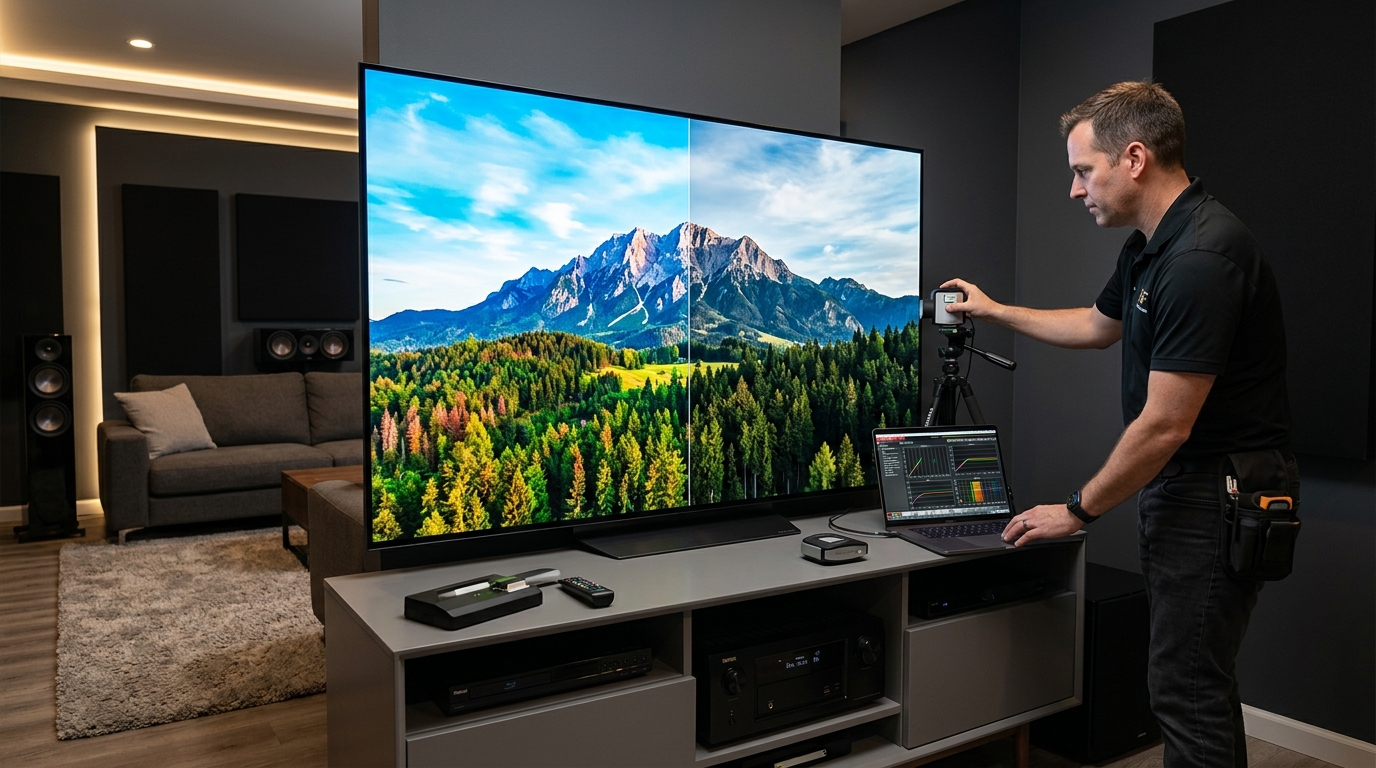
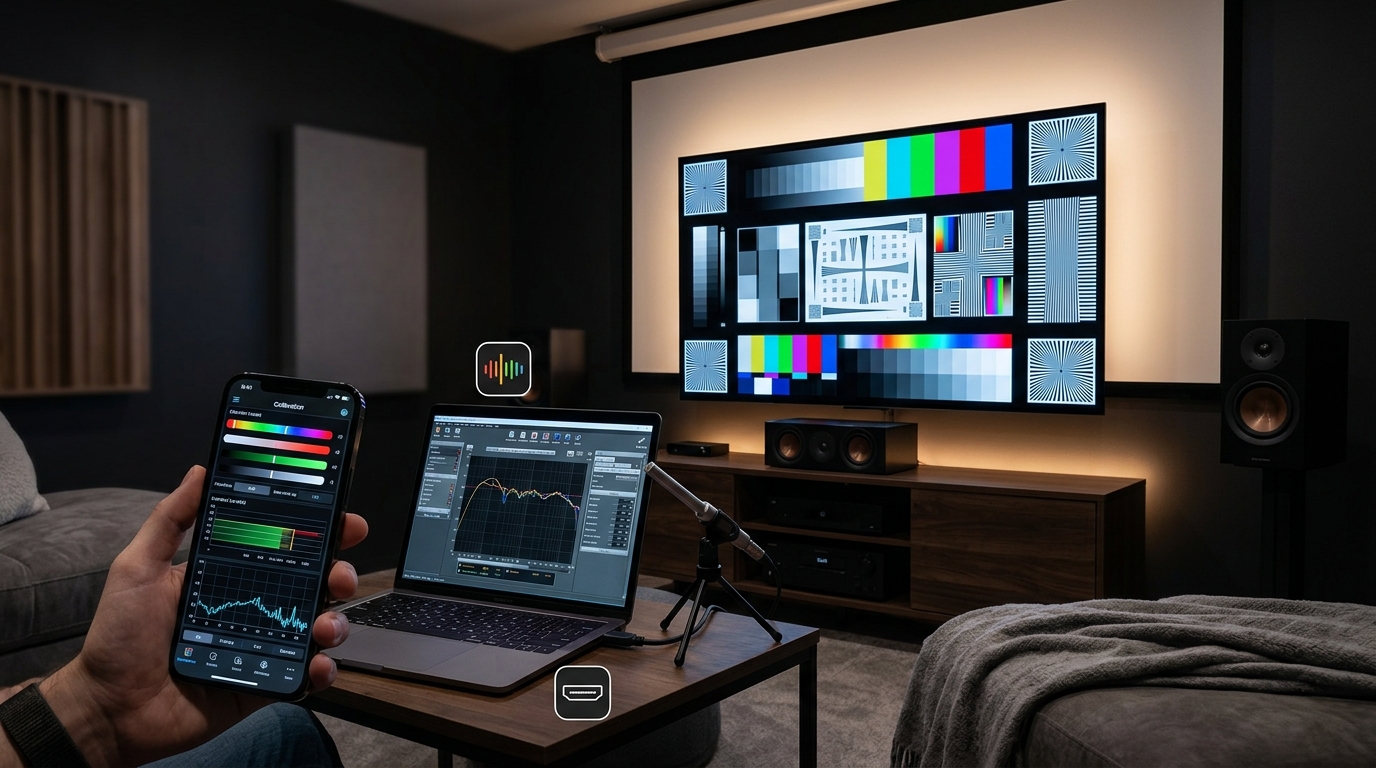
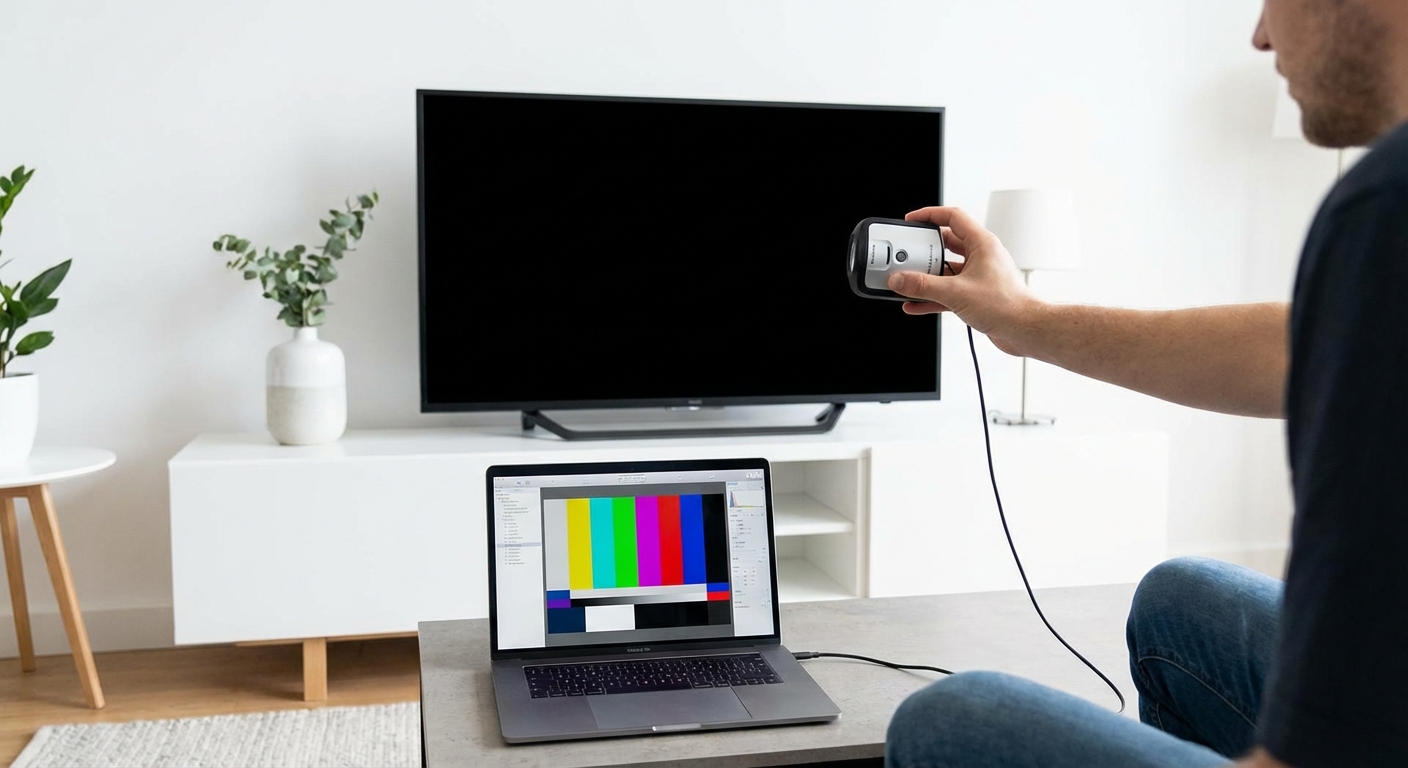
Professional calibration uses a colorimeter or spectrophotometer to measure light output and color accuracy. A calibrator adjusts the same settings but targets specific industry standards like Rec. 709 for HD or DCI-P3 for HDR.
The process takes two to four hours and costs between $300 and $600. You get a calibration report showing before and after measurements. The image matches what directors intended when they graded the content.
For most gamers, basic calibration is enough. If you also watch movies on the same projector and want reference accuracy, professional calibration pays off.
How to calibrate game mode yourself in six steps
You don’t need expensive tools to improve game mode. Follow this process and you’ll get 80% of the way to professional results.
- Set your projector to game mode and let it warm up for 20 minutes. Projector colors shift during the first few minutes of operation.
- Turn off all room lights and close blinds. Ambient light skews your perception of brightness and contrast.
- Load a test pattern disc or streaming app. Look for patterns that show black levels, white levels, color bars, and grayscale ramps.
- Adjust brightness until you can just barely see the difference between the darkest gray bar and pure black. Go too high and black levels wash out.
- Adjust contrast until the brightest white bar is visible but not blown out. If you lose detail in clouds or snow, you’ve gone too far.
- Set color temperature to the warmest setting that doesn’t look orange. Most projectors ship with cool color temps that look blue. Warm or Warm2 usually gets closer to accurate.
After these six steps, your game mode image will look more natural. Colors won’t pop as aggressively, but they’ll match real life better.
If you want to go further, adjust color saturation until reds, greens, and blues look vivid but not cartoonish. Use a color bar pattern and compare skin tones to your own hand.
Common mistakes that ruin game mode calibration
Even experienced users make these errors. Avoid them and your calibration will hold up over time.
| Mistake | Why it happens | How to fix it |
|---|---|---|
| Calibrating with lights on | Room light reflects off the screen and makes blacks look gray | Turn off all lights and wait until evening |
| Maxing out contrast for brightness | Bright highlights feel impressive but clip detail | Lower contrast until you see texture in white objects |
| Using vivid or dynamic presets as a starting point | These modes add processing that conflicts with game mode | Always start from the actual game mode preset |
| Skipping warm-up time | Projector color shifts during the first 15 to 20 minutes | Let the projector run for 20 minutes before adjusting |
| Adjusting sharpness above zero | Edge enhancement can add processing delay | Keep sharpness at zero or one notch above |
| Trusting factory color labels | “Warm” on one brand might be “Cool” on another | Use test patterns, not label names |
The biggest mistake is assuming calibration will make the image dimmer or less exciting. Proper calibration actually reveals more detail because you’re not clipping highlights or crushing shadows.
When professional calibration makes sense for gamers
Hiring a calibrator isn’t necessary for everyone. But certain situations justify the cost.
You should consider professional calibration if:
- You use the projector for both gaming and home theater and want one mode that excels at both
- Your projector supports advanced color management and you want to fine-tune individual color points
- You’re setting up a dedicated gaming room and want the image dialed in perfectly
- You’ve tried basic calibration and still see color casts or tinting you can’t fix
- Your projector has HDR game mode and you want proper tone mapping for HDR content
Professional calibrators use tools like the X-Rite i1Display Pro or Klein K10-A to measure color accuracy down to delta E values below 2. That’s the threshold where the human eye can’t detect errors.
They also create custom gamma curves and white balance adjustments across the entire brightness range. This ensures grays stay neutral from black to white.
The downside is cost and availability. Not every city has qualified calibrators, and some won’t work on projectors in game mode because they assume you’ll switch modes frequently.
If you decide to hire a pro, make it clear you want game mode calibrated and that you won’t be switching to cinema mode. Some calibrators will refuse. Find one who understands gaming priorities.
How calibration interacts with HDR and different game types
HDR complicates calibration because it uses dynamic metadata to adjust brightness scene by scene. Your projector interprets this data and maps it to its peak brightness capability.
In HDR game mode, you can still adjust color temperature, color saturation, and gamma. But brightness and contrast often get locked or limited because the HDR signal controls those dynamically.
If your projector allows HDR tone mapping adjustments, set it to match your room conditions. Bright rooms need higher tone mapping to combat ambient light. Dark rooms can use lower settings for better shadow detail.
Different game types also benefit from different calibration priorities:
- Competitive shooters and fighting games need accurate shadow detail so you can spot enemies in dark corners
- Racing games benefit from vibrant but accurate colors so track details pop
- RPGs and story-driven games reward balanced calibration that matches the developer’s artistic intent
You can create multiple game mode presets if your projector supports it. One for competitive play, one for single-player games. Just make sure each preset starts from the game mode base to preserve low input lag.
Measuring whether your calibration actually improved anything
After calibration, you need to verify the results. Subjective impressions help, but objective tests confirm you didn’t make things worse.
Load a test pattern with a grayscale ramp. The bars should transition smoothly from black to white with no sudden jumps or color tints. If you see green in dark grays or pink in bright grays, your white balance needs more work.
Check skin tones in a game you know well. Faces should look natural, not orange or pink. If characters look sunburned, your color temperature is too warm. If they look like vampires, it’s too cool.
Compare before and after by switching between your calibrated game mode and the stock preset. The difference should be obvious. If you can’t tell them apart, you either nailed it on the first try or didn’t change enough.
One test that’s often overlooked: play a dark game level and check whether you can see details in shadows without raising brightness so high that black levels turn gray. Good calibration balances these extremes.
If you want to get technical, smartphone apps like DisplayCAL can measure basic color accuracy using your phone’s camera. They’re not as precise as dedicated colorimeters, but they’ll show whether you’re in the ballpark.
How often game mode calibration needs to be redone
Projector bulbs and laser light sources drift over time. Colors shift, brightness decreases, and white balance changes.
For lamp-based projectors, recalibrate every 500 to 1,000 hours of use. That’s when color shift becomes noticeable. If you game three hours a day, that’s every six to twelve months.
Laser projectors are more stable. You can go 2,000 to 3,000 hours between calibrations. Some users report no noticeable drift even after 5,000 hours, but that depends on the model.
If you move your projector or change your screen, recalibrate. Screen materials affect color temperature and brightness, and even small position changes can alter geometry and focus.
Firmware updates sometimes reset picture settings or change how game mode behaves. After updating, double-check your calibration and re-adjust if needed.
Keep notes on your settings. Write down brightness, contrast, color, tint, and color temperature values. If your projector resets or you accidentally change something, you can restore your calibration without starting over.
Calibrating game mode without sacrificing input lag
The fear is that any adjustment will add processing delay. That’s not how it works.
Input lag comes from video processing features like motion smoothing, frame interpolation, noise reduction, and advanced color processing. These features analyze multiple frames and predict what should happen next.
Calibration adjusts static settings. Brightness, contrast, color, and white balance are applied in real time without buffering frames. They don’t add lag.
The only setting to watch is sharpness. Some projectors use edge enhancement algorithms that analyze edges and boost them. This can add a few milliseconds. Keep sharpness at zero or minimal.
If you’re paranoid about lag, test before and after calibration using a lag tester or the 240fps camera method. You’ll see no difference.
One exception: some projectors have a “game mode” that’s actually just cinema mode with processing turned off. If your game mode allows you to toggle features on and off, make sure everything that adds processing stays disabled.
The how to calibrate your TV in 30 minutes without hiring a professional guide covers similar principles that apply to projectors, especially around avoiding processing features that introduce delay.
Balancing game mode with movie watching on the same projector
Many gamers also use their projectors for movies and TV shows. Switching between game mode and cinema mode every time you change activities gets old fast.
The solution is to calibrate both modes and use the one that fits your current priority. Game mode for anything interactive, cinema mode for passive viewing.
But if you want one mode that does both reasonably well, calibrate game mode to reference standards. You’ll sacrifice some advanced processing features like motion smoothing, but you’ll keep low lag and get accurate colors.
Some projectors offer a “filmmaker mode” that disables processing but doesn’t prioritize input lag. This can be a middle ground, though it’s not ideal for competitive gaming.
If your projector supports custom presets, create a hybrid mode. Start from game mode, adjust color and brightness to match cinema mode as closely as possible, and save it as a separate preset. You’ll get near-cinema quality with game mode lag.
The trade-off is motion handling. Game mode won’t smooth 24fps movie judder the way cinema mode does. If that bothers you, stick with separate modes for gaming and movies.
“Calibration doesn’t mean making the image look how you think it should look. It means making the image match the source material as the creator intended. Game mode can achieve that without adding lag.” – Professional calibrator with 15 years of experience
Why some projectors make game mode calibration harder
Not all projectors give you the same level of control in game mode. Budget models often lock settings or provide fewer adjustments.
Common limitations include:
- Color temperature locked to one or two presets
- No access to individual color management
- Gamma curve fixed with no adjustment
- Brightness and contrast ranges restricted
- No ability to save custom game mode presets
If your projector has these limits, you can still improve the image with the controls available. Even adjusting brightness and contrast makes a difference.
Higher-end models from BenQ, Epson, JVC, and Sony typically offer full control in game mode. You can adjust everything a calibrator would use, including 2-point and 10-point white balance and color management systems.
Before buying a gaming projector, check whether game mode allows calibration. Read the manual or ask in forums. Some models advertise game mode but lock it down so tightly that calibration is impossible.
If you already own a projector with limited game mode controls, consider whether the image bothers you enough to upgrade. If you’re happy with stock settings, there’s no need to change anything.
What to do when game mode looks worse after calibration
Sometimes calibration makes the image look worse, not better. This happens when you overcorrect or adjust settings in the wrong order.
If your calibrated game mode looks dim, you probably set brightness too low or contrast too high. Go back and re-adjust using test patterns, not game content.
If colors look muted, you may have reduced saturation too much. Accurate colors are less vivid than oversaturated ones, but they shouldn’t look gray. Bump saturation up a few notches.
If the image looks too warm or too cool, revisit color temperature. Try the next preset up or down and see if it looks more neutral.
If nothing looks right, reset game mode to factory defaults and start over. Take notes this time so you can track what each adjustment does.
One common issue is adjusting settings with HDR content, then switching to SDR and finding everything looks wrong. Calibrate SDR and HDR separately if your projector allows it. They require different settings.
Another issue is screen gain. High-gain screens amplify brightness but can shift colors. If you calibrated on a white wall and then installed a gray or silver screen, you’ll need to recalibrate.
Deciding whether stock game mode is good enough for you
Not everyone needs calibration. If you’re happy with how your projector looks out of the box, there’s no obligation to change it.
Stock game mode works fine if:
- You mostly play fast-paced games where color accuracy doesn’t matter
- Your room has ambient light that would wash out a calibrated image anyway
- You don’t notice color casts or crushed shadows
- You’re not watching movies or TV shows on the same projector
Some manufacturers tune game mode surprisingly well. BenQ’s game modes, for example, often come close to accurate without adjustment. Sony and Epson also do decent jobs.
The best way to decide is to try basic calibration and compare it to stock. If you prefer stock, stick with it. Calibration is a tool, not a requirement.
If you do prefer the calibrated image, you’ll never want to go back. Once you see accurate colors and proper black levels, oversaturated stock settings look cartoonish.
Getting the most out of your gaming setup beyond just the projector
Calibrating your projector is one piece of a larger puzzle. The room itself affects picture quality just as much as the settings.
Ambient light is the biggest enemy. Even a small amount of light reflecting off the screen raises black levels and reduces contrast. Use blackout curtains or game at night for the best results.
Screen choice matters too. A good ALR (ambient light rejecting) screen can help in bright rooms, but it won’t fix poor calibration. Start with calibration, then upgrade the screen if needed.
Sound quality also impacts immersion. If you’re serious about gaming, consider how how to stop echo and reverb ruining your home theater sound principles apply to your gaming space. Clear dialogue and positional audio make a huge difference in competitive play.
Projector placement affects image quality too. If you’re not sure about the ideal distance for your screen size, the how to calculate projector throw distance for your room size guide walks through the math.
Finally, don’t ignore input lag from other sources. Your TV or projector might be fast, but if your receiver or soundbar adds delay, you’ll still feel sluggish response. Use game mode on every device in the signal chain.
Making calibration part of your regular gaming setup routine
Once you’ve calibrated game mode, maintaining it becomes part of your routine. Check settings every few months, especially after firmware updates.
Keep a calibration checklist:
- Verify brightness and contrast using test patterns
- Check color temperature for neutral grays
- Confirm game mode is active and processing features are off
- Test input lag if you suspect changes
- Compare to your notes from the last calibration
If you notice drift, recalibrate. It’s faster the second time because you already know what settings work.
Some gamers recalibrate seasonally. Summer daylight affects room conditions differently than winter darkness. Adjusting for these changes keeps the image consistent year-round.
Others recalibrate whenever they upgrade their console or PC. New hardware sometimes outputs video differently, and a fresh calibration ensures compatibility.
The key is treating calibration as an ongoing process, not a one-time event. Your projector changes over time, and your preferences might too.
Why calibrated game mode beats stock settings every time
Stock game mode prioritizes speed. Calibrated game mode delivers speed and accuracy.
The difference isn’t subtle. Calibrated images show more shadow detail, more accurate skin tones, and smoother gradients. Highlights don’t clip. Blacks don’t turn gray.
You’ll notice it most in games with strong art direction. Titles like The Last of Us, Red Dead Redemption, or Horizon Zero Dawn look dramatically better when colors match the developer’s intent.
Even competitive games benefit. Spotting enemies in dark corners is easier when black levels are properly set. Reading UI elements is clearer when white balance is neutral.
Calibration takes 20 to 30 minutes for basic adjustments, maybe an afternoon if you hire a pro. The improvement lasts for months or years depending on your projector type.
Stock settings are a starting point, not a destination. Manufacturers can’t predict your room, your screen, or your preferences. Calibration personalizes the image to your exact setup.
If you’ve been gaming on stock settings, try calibration once. You’ll see why it matters.


Leave a Reply