You’re planning your home theater and staring at two mounting options that look similar but perform differently. In wall speakers disappear behind your drywall while on wall speakers attach to the surface. Both save floor space, but they differ in sound quality, installation complexity, cost, and flexibility. This guide breaks down every factor so you can choose the right mounting method for your room, budget, and skill level.
In wall speakers offer cleaner aesthetics and better bass response but require cutting drywall and limit future changes. On wall speakers install faster, cost less, and let you adjust placement easily, though they protrude from your walls. Choose in wall for permanent installations where appearance matters most, or on wall for flexibility and simpler setup.
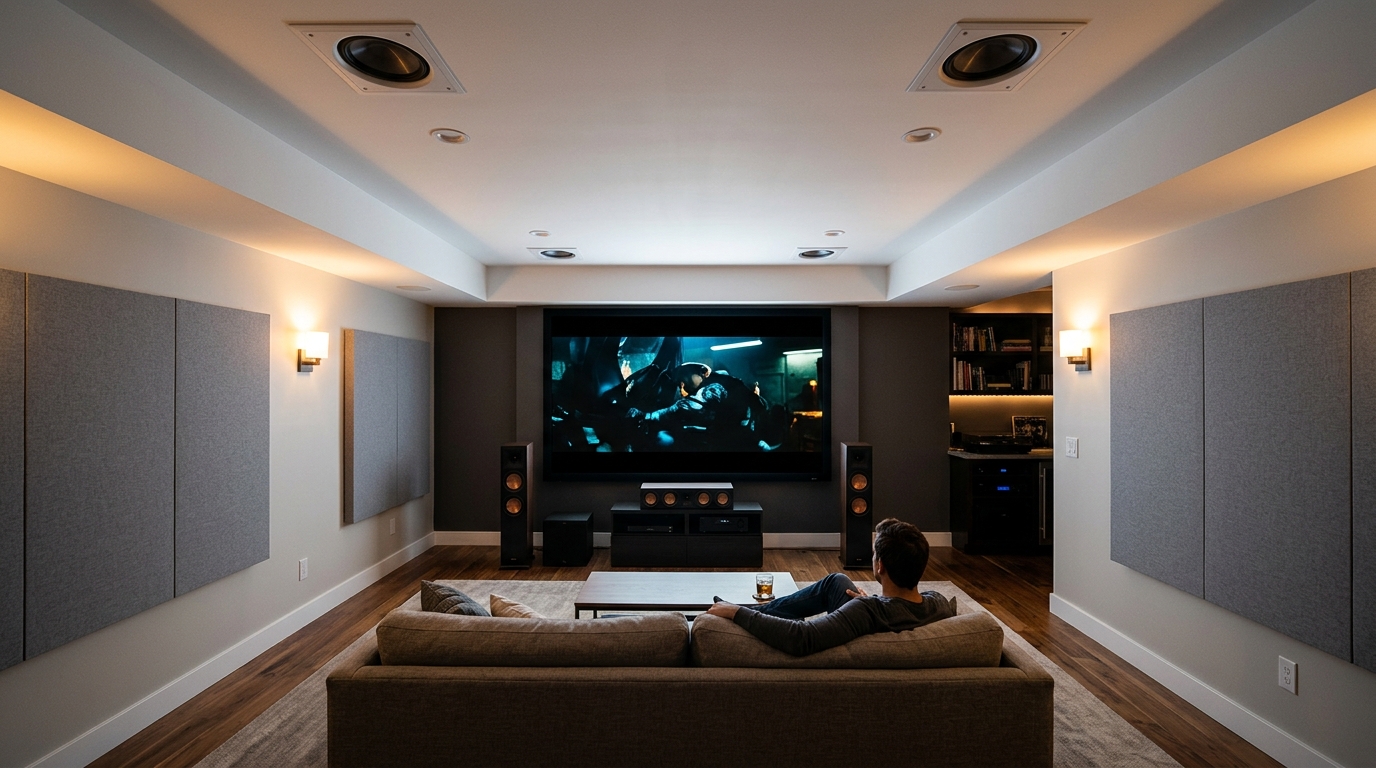
What Makes In Wall Speakers Different
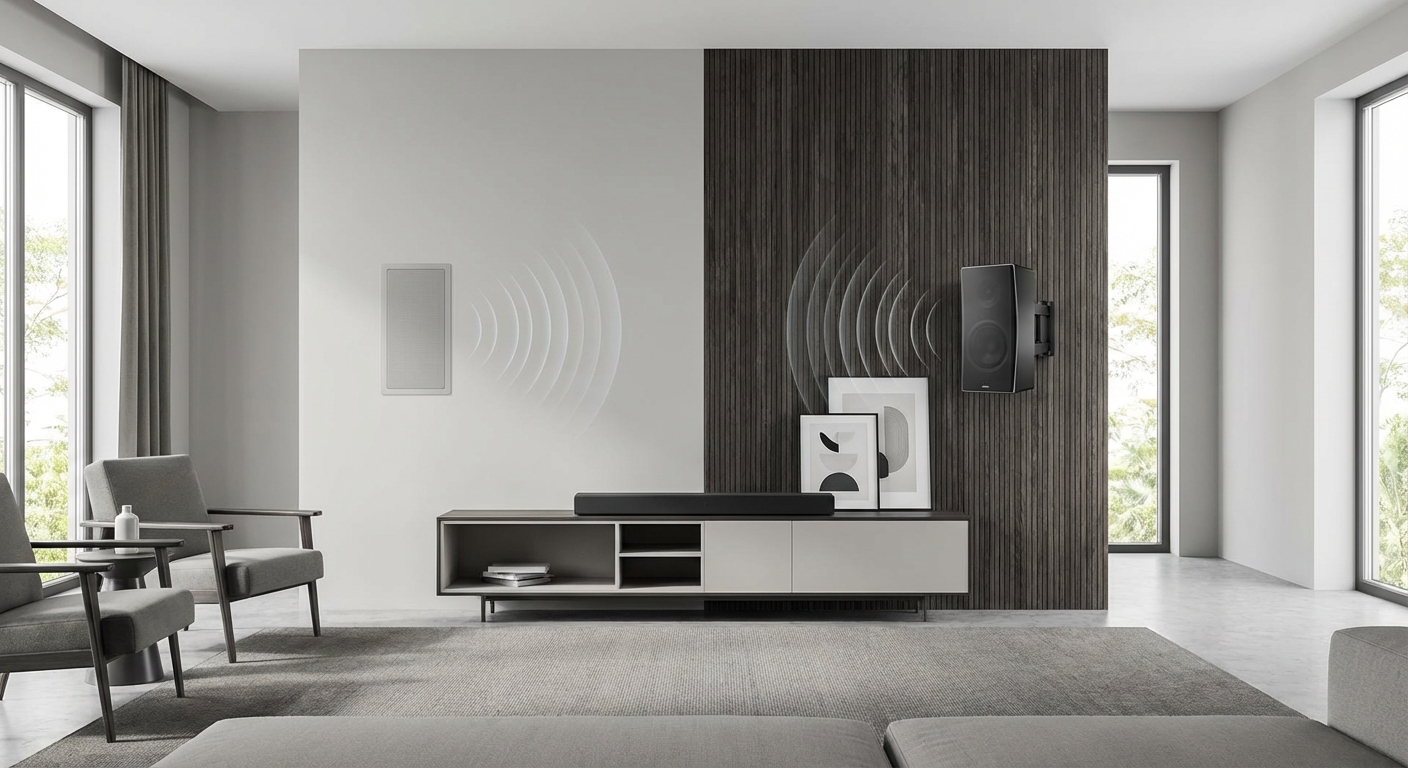
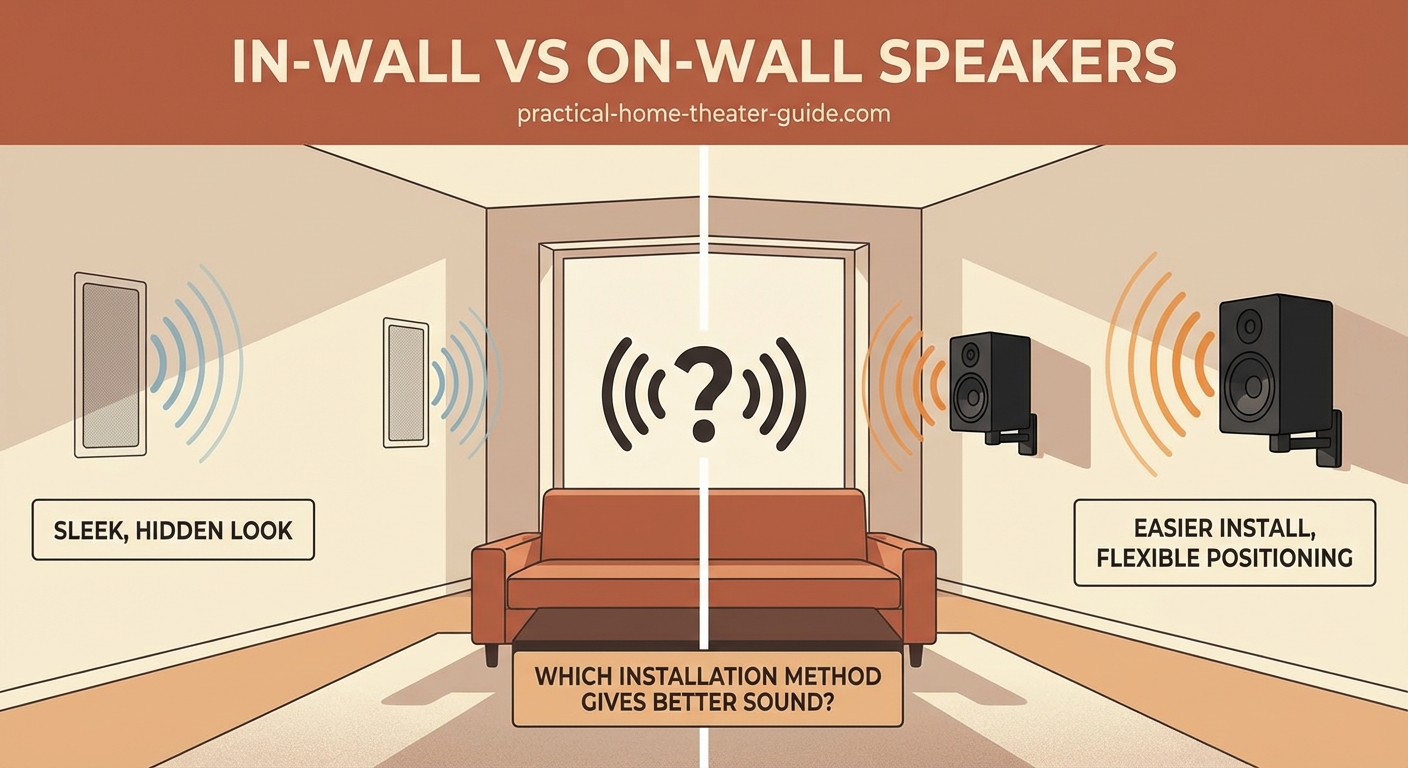
In wall speakers mount flush inside your drywall between wall studs. You cut an opening, run speaker wire through the wall cavity, and secure the speaker frame to the drywall. The grille sits nearly flat against the wall surface.
The wall cavity acts as an enclosure. This gives you more bass response than you’d expect from a small driver. The rigid mounting also reduces vibration that can muddy sound.
Installation requires cutting precise holes and running speaker wire through walls without damaging your home. You’ll need a drywall saw, stud finder, and fish tape or wire pulling tools.
Most in wall speakers use spring-loaded clamps or rotating dog-ear brackets. These grip the back of the drywall and hold the speaker in place without requiring access behind the wall.
You can paint the grilles to match your wall color. Some manufacturers include magnetic grilles that snap on and off without visible screws.
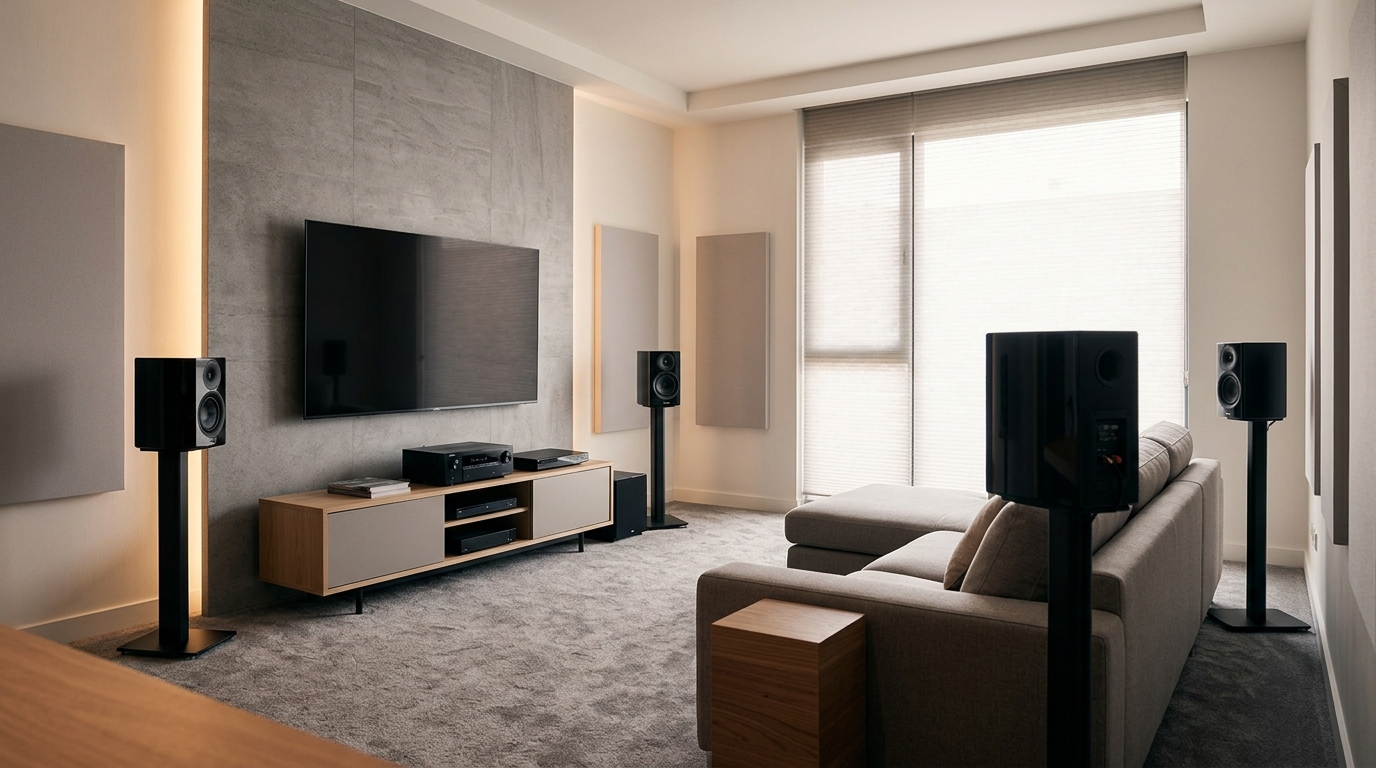
How On Wall Speakers Work Instead
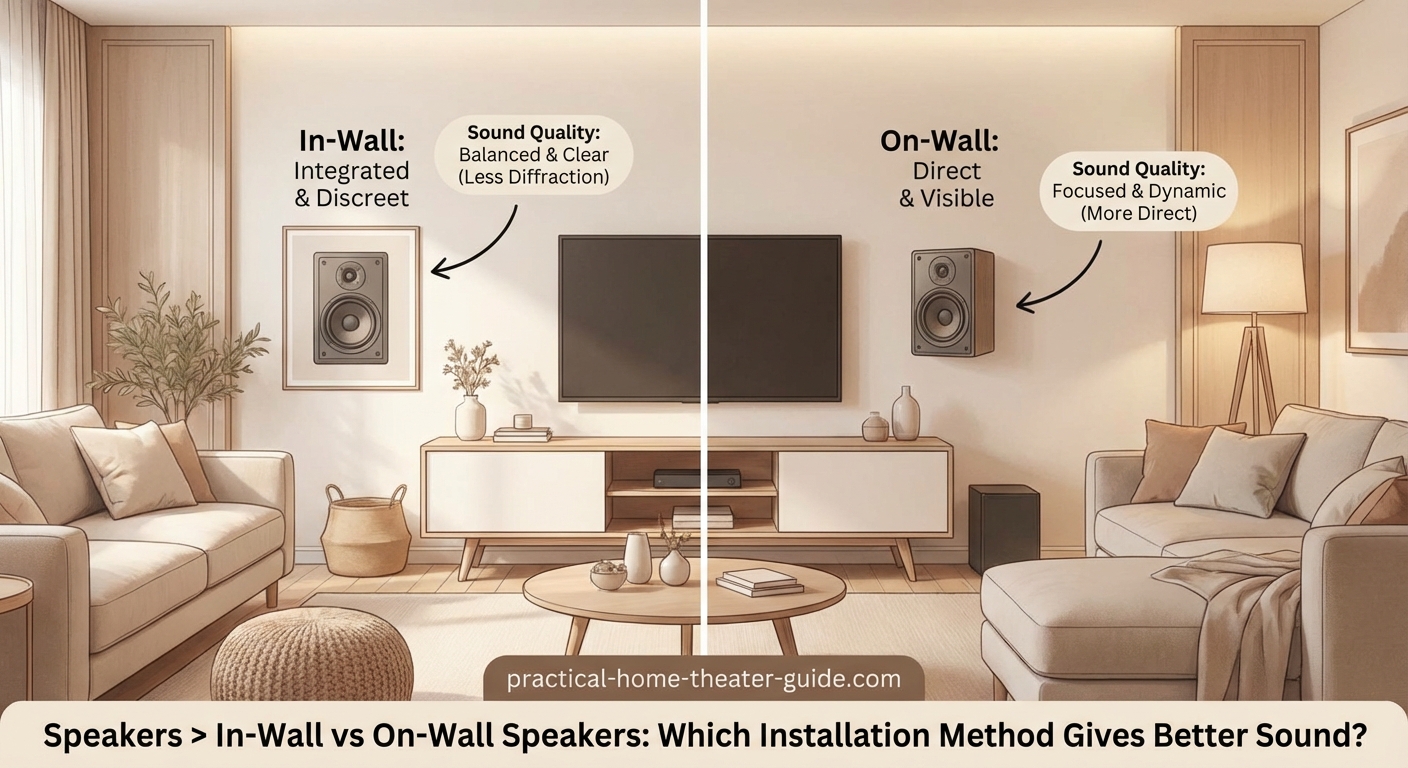
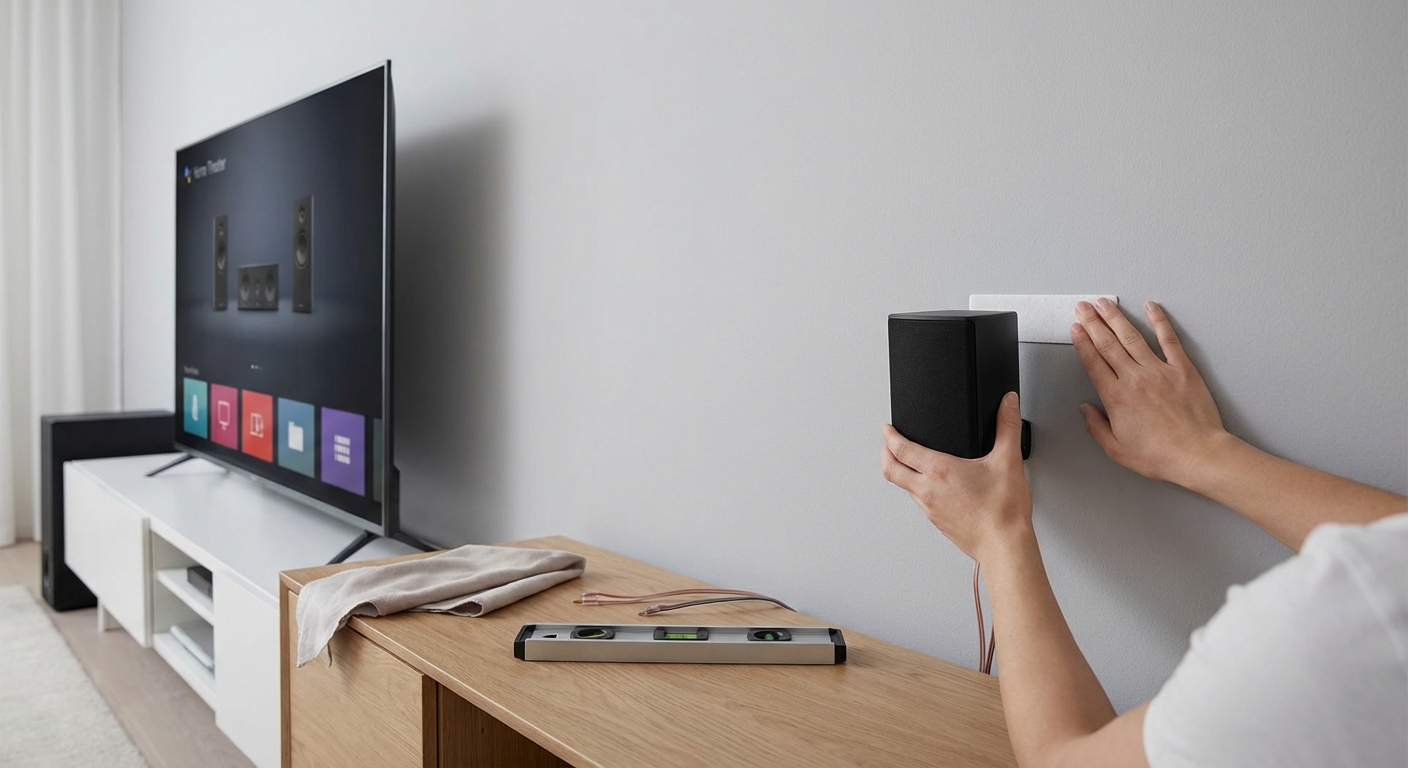
On wall speakers attach directly to your wall surface using brackets or keyhole mounts. No cutting required. You mount a bracket to the wall studs or use heavy-duty drywall anchors, then hang or bolt the speaker enclosure to the bracket.
The speaker cabinet extends several inches from the wall. This creates a small gap behind the speaker that affects bass response. Most on wall models include sealed or ported enclosures to compensate.
Installation takes 30 minutes per speaker if you have a drill and level. You mark the mounting holes, drill pilot holes, drive screws into studs or anchors, and attach the speaker.
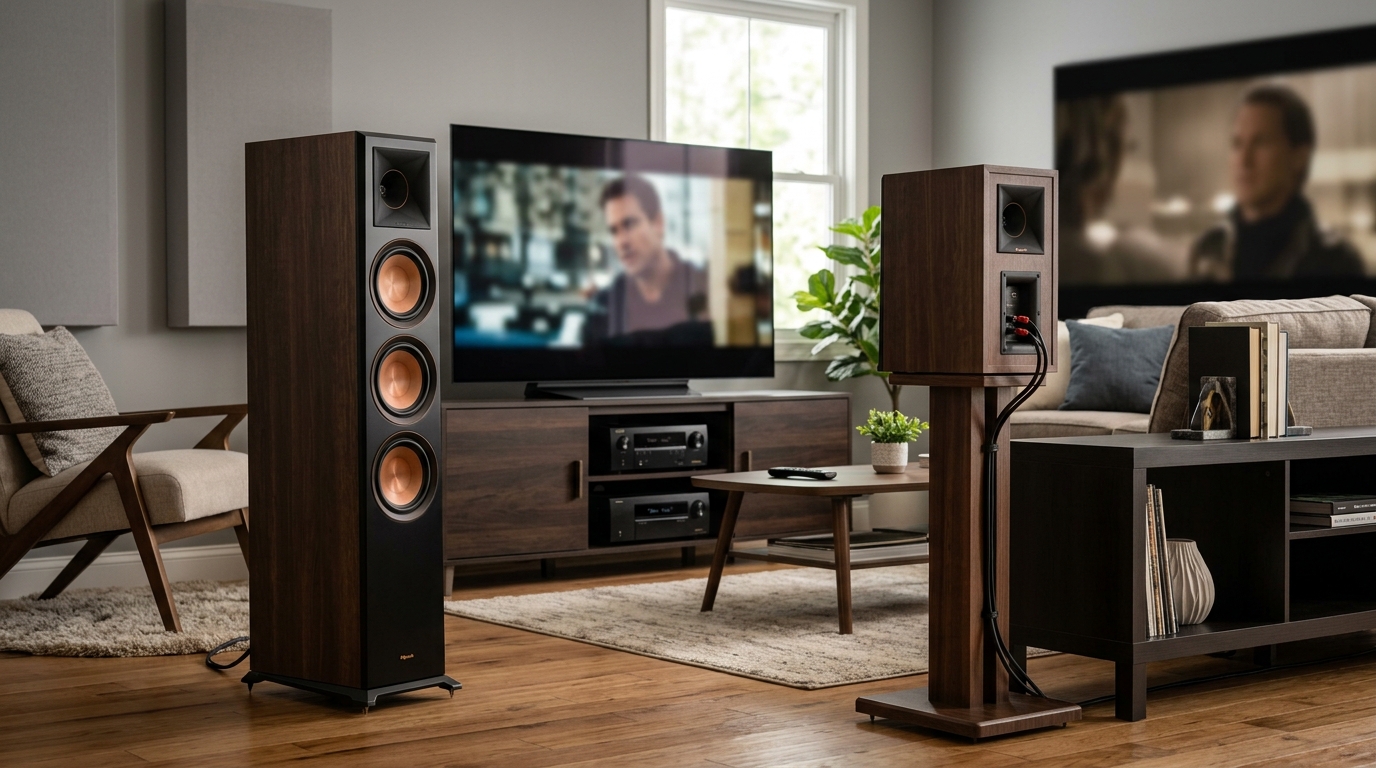
On wall speakers come in various depths. Slim profile models protrude 3 to 4 inches. Standard models extend 5 to 8 inches. The deeper the cabinet, the better the low frequency response.
You can adjust placement after installation. Unscrew the speaker, patch the holes, and move it to a new location. This flexibility helps when you’re fine-tuning your surround sound positions or rearranging furniture.
Sound Quality Differences That Matter
In wall speakers benefit from wall cavity coupling. The space behind the speaker acts like a larger enclosure, extending bass response by 10 to 20 Hz compared to the same driver in free air.
But wall cavities vary. Insulation, stud spacing, and nearby plumbing or electrical lines all affect sound. A cavity packed with fiberglass insulation dampens resonances. An empty cavity between 16-inch studs creates a small chamber that boosts certain frequencies unpredictably.
On wall speakers give you consistent performance because the enclosure is engineered and sealed. The manufacturer controls the internal volume, port tuning, and damping materials. You get the sound they designed.
Soundstage and imaging also differ. In wall speakers can create a wider soundstage because the drivers sit closer to flush with the wall surface. Reflections off the wall arrive at your ears with minimal delay.
On wall speakers project sound from a position several inches forward. This can improve clarity for voices and instruments in the midrange. The cabinet edges also create diffraction that affects off-axis response.
Neither mounting method is universally better. In wall speakers excel for distributed audio where you want even coverage without visible hardware. On wall speakers work better when you need to aim the speaker toward a specific seating position or optimize room acoustics.
Installation Complexity and Time Investment
In wall installation follows these steps:
- Locate wall studs and mark speaker positions at ear height when seated.
- Check for electrical wiring, plumbing, or HVAC ducts using a stud finder with wire detection.
- Trace the speaker template and cut the drywall opening with a drywall saw or rotary tool.
- Run speaker wire from your receiver location to each speaker opening through the wall cavity.
- Connect the wire to the speaker terminals and secure the speaker frame using the mounting clamps.
- Attach the grille and test the sound.
Expect 90 minutes to 2 hours per speaker if you’re new to this work. Experienced installers finish in 30 to 45 minutes per location.
On wall installation is faster:
- Mark the bracket mounting holes at the desired height and distance from the corner.
- Drill pilot holes and drive screws into wall studs or install heavy-duty anchors.
- Attach the mounting bracket and verify it’s level.
- Run speaker wire along the baseboard or behind furniture to each speaker location.
- Connect the wire to the speaker terminals and mount the speaker to the bracket.
You’ll finish in 20 to 40 minutes per speaker. No drywall repair needed if you change your mind later.
Renters face restrictions. Most leases prohibit cutting drywall. On wall speakers leave only small screw holes that you can patch with spackle when you move out.
Cost Breakdown for Both Options
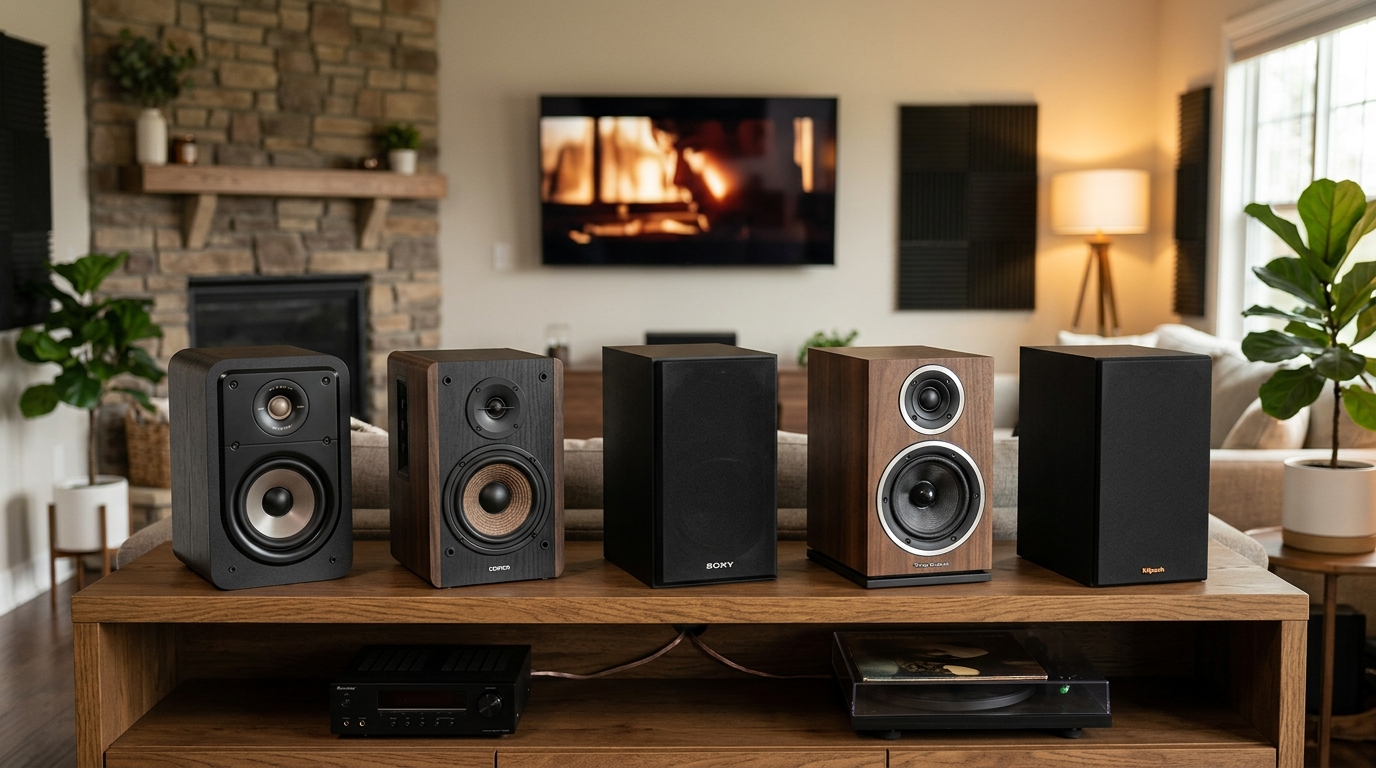
In wall speakers range from $50 to $500 per speaker. Budget models use 5.25-inch woofers and basic tweeters. Premium models feature 8-inch woofers, pivoting tweeters for better aiming, and higher quality crossovers.
On wall speakers cost $80 to $600 per speaker. The cabinet, internal bracing, and enclosure design add material costs. High-end models include adjustable mounting brackets that let you tilt and swivel the speaker.
Installation supplies add to your budget:
| Item | In Wall Cost | On Wall Cost |
|---|---|---|
| Speaker wire (100 feet) | $25 to $60 | $25 to $60 |
| Wall plates and connectors | $10 to $30 | $10 to $30 |
| Drywall saw and fish tape | $30 to $50 | Not needed |
| Mounting brackets | Included | Usually included |
| Drywall anchors | Not needed | $8 to $15 |
| Paint for grilles | $10 to $20 | Not needed |
Professional installation costs $100 to $200 per speaker for in wall work. The installer handles cutting, wire fishing, and testing. On wall installation runs $50 to $100 per speaker because it’s simpler.
Factor in future costs too. In wall speakers are permanent. If you upgrade, you’ll need new speakers that fit the same cutout size or you’ll patch and recut the drywall. On wall speakers unscrew and move to your next home.
Room Aesthetics and Visual Impact
In wall speakers nearly disappear. You see a small grille that blends with the wall texture. Paint the grille to match your wall color and guests won’t notice them until you turn on the system.
This matters in formal living rooms, dining rooms, or bedrooms where you want clean walls. In wall speakers don’t compete with artwork, windows, or architectural features.
On wall speakers create a visible presence. Even slim profile models protrude enough to cast shadows and break up wall lines. Black or white finishes stand out against colored walls.
But visibility has benefits. On wall speakers look intentional. They signal that you care about sound quality. Some models feature attractive wood veneer or curved cabinets that complement modern furniture.
Consider your room layout. In wall speakers work well on walls without furniture nearby. On wall speakers suit walls behind sofas or adjacent to TV stands where the protruding cabinet won’t interfere with movement.
Ceiling height affects appearance too. In wall speakers mounted 6 feet high on 8-foot walls look proportional. On wall speakers on the same wall can appear top-heavy if the cabinet is large.
Flexibility and Future Changes
In wall speakers lock you into fixed positions. Moving them requires patching the old holes, repainting, cutting new openings, and fishing new wire. This takes hours and leaves visible repairs if you’re not skilled at drywall work.
On wall speakers adapt to room changes. You unscrew them, patch four to six small holes, and remount elsewhere. This flexibility helps when you:
- Rearrange furniture and need to adjust speaker angles
- Upgrade to larger speakers with better performance
- Move to a new home and take your speakers with you
- Experiment with placement to find the sweet spot
Renters benefit most from on wall flexibility. You avoid lease violations and restore walls to original condition with minimal effort.
Technology upgrades also favor on wall speakers. Home theater formats evolve. Dolby Atmos added height channels. Future formats may require different speaker placements. On wall speakers let you adapt without major renovation.
In wall speakers make sense for permanent installations where you’ve finalized your room layout and display setup. Once installed correctly, they deliver years of invisible performance.
Common Mistakes to Avoid
| Mistake | Why It Hurts | Better Approach |
|---|---|---|
| Cutting in wall openings without checking for wires | You risk electrical shock or cutting live wires | Use a stud finder with wire detection and cut slowly |
| Mounting on wall speakers with drywall anchors only | Speakers vibrate loose and fall over time | Always mount to wall studs when possible |
| Painting in wall grilles while attached | Paint clogs the mesh and reduces sound quality | Remove grilles and use thin coats of spray paint |
| Placing speakers too close to corners | Bass builds up and sounds boomy | Keep speakers at least 12 inches from corners |
| Skipping speaker wire quality | Thin wire increases resistance and reduces power | Use 14-gauge or 16-gauge wire for runs under 50 feet |
| Ignoring stud spacing for in wall speakers | Speaker won’t fit between studs | Measure stud spacing before buying speakers |
Another common error is mismatching impedance. Most home theater receivers expect 8-ohm speakers. Check your speaker specifications and receiver manual to avoid overheating or distortion.
Forgetting to label wires causes confusion during installation. Mark each wire with tape showing its destination (left front, right surround, etc.) before running it through walls.
Which Installation Method Fits Your Situation
Choose in wall speakers when:
- You own your home and plan to stay long-term
- Clean aesthetics matter more than flexibility
- Your walls have accessible cavities without obstructions
- You’re comfortable with drywall cutting and repair
- You want speakers that disappear visually
Choose on wall speakers when:
- You rent or might move within a few years
- You want to adjust placement after installation
- Your walls contain plumbing, wiring, or insulation that blocks in wall mounting
- You prefer faster installation without cutting drywall
- You’re building a dedicated theater room where visible speakers fit the aesthetic
Budget-conscious buyers often start with on wall speakers. You can install them yourself in a weekend and upgrade later without wasting your investment.
Perfectionists who want the cleanest possible look choose in wall speakers despite the extra work. The invisible installation justifies the time and effort.
“The best speaker mounting method is the one you’ll actually install correctly. A properly positioned on wall speaker beats a poorly placed in wall speaker every time. Focus on getting the angles and distances right for your seating position before worrying about whether the speaker protrudes two inches.” — Home theater installer with 15 years experience
Getting Your Installation Right
Start by mapping your room. Measure the distance from your main seating position to each speaker location. Front left and right speakers should form an equilateral triangle with your seat. Surround speakers go 90 to 110 degrees to the sides.
Mark your wall at seated ear height, typically 36 to 42 inches from the floor. This positions the tweeter at the right level for clear dialogue and imaging.
Test speaker positions before making permanent changes. For in wall speakers, tape cardboard cutouts to the wall and listen to music from those spots. For on wall speakers, set them on temporary stands or boxes at the planned height.
Run wire before final installation. This gives you flexibility to adjust routes if you hit obstacles. Leave 12 to 18 inches of extra wire at each speaker location for easy connections.
Level every speaker. A tilted speaker creates uneven sound distribution. Use a bubble level or smartphone app to verify both horizontal and vertical alignment.
After installation, calibrate your system. Most receivers include automatic calibration that measures distances and sets levels. Run this process to optimize sound for your specific room and speaker positions.
Making Your Home Theater Sound Better
Choosing between in wall vs on wall speakers depends on your priorities. In wall speakers deliver invisible integration and leverage wall cavities for better bass, but they require cutting drywall and commit you to fixed positions. On wall speakers install faster, cost less for DIY work, and let you adjust placement, though they protrude from your walls and need careful aesthetic consideration.
Neither option is wrong. Match the mounting method to your situation. Homeowners planning long-term installations in finished rooms benefit from in wall speakers. Renters and anyone who values flexibility should choose on wall speakers. Both can deliver excellent sound when positioned correctly and matched to quality components. Pick the approach that fits your skills, timeline, and vision for your space, then focus on getting the placement and calibration right.


Leave a Reply