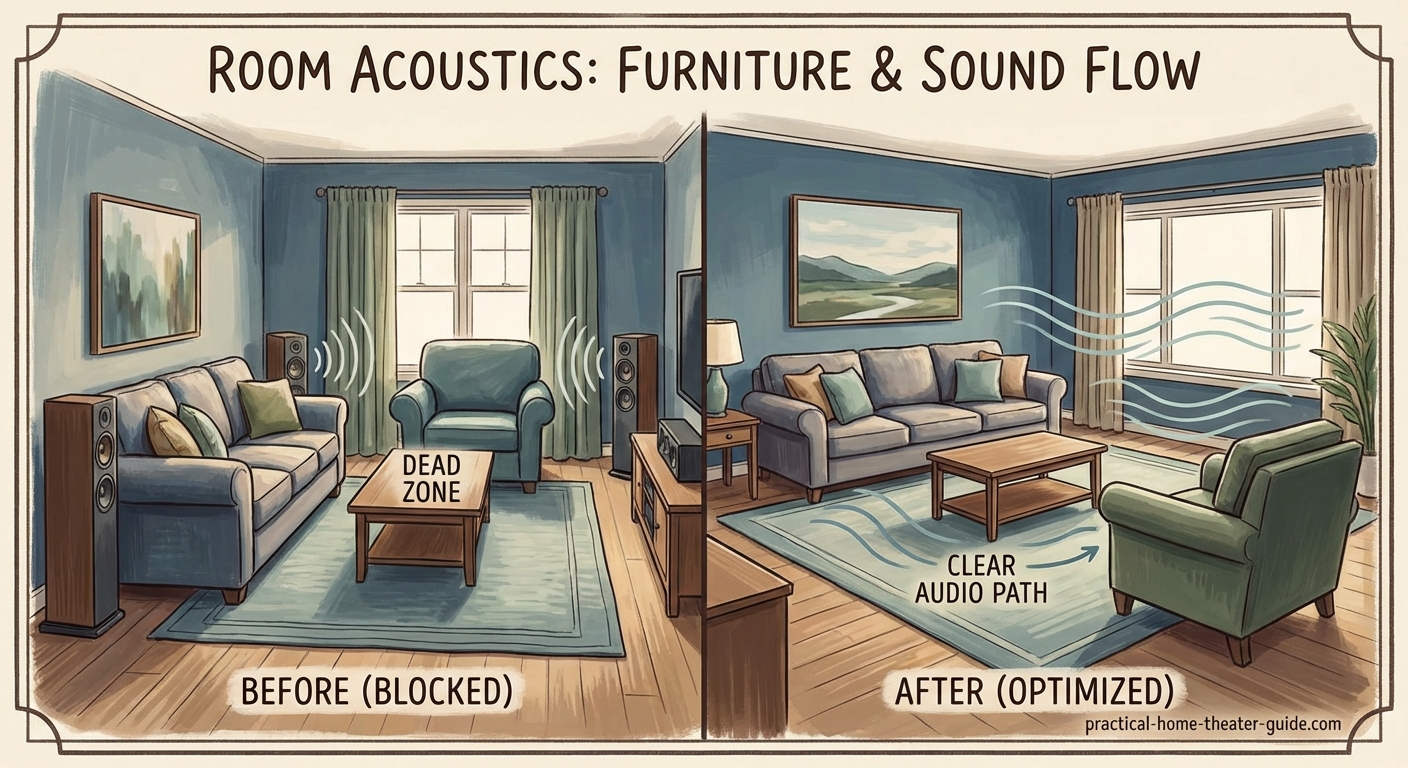
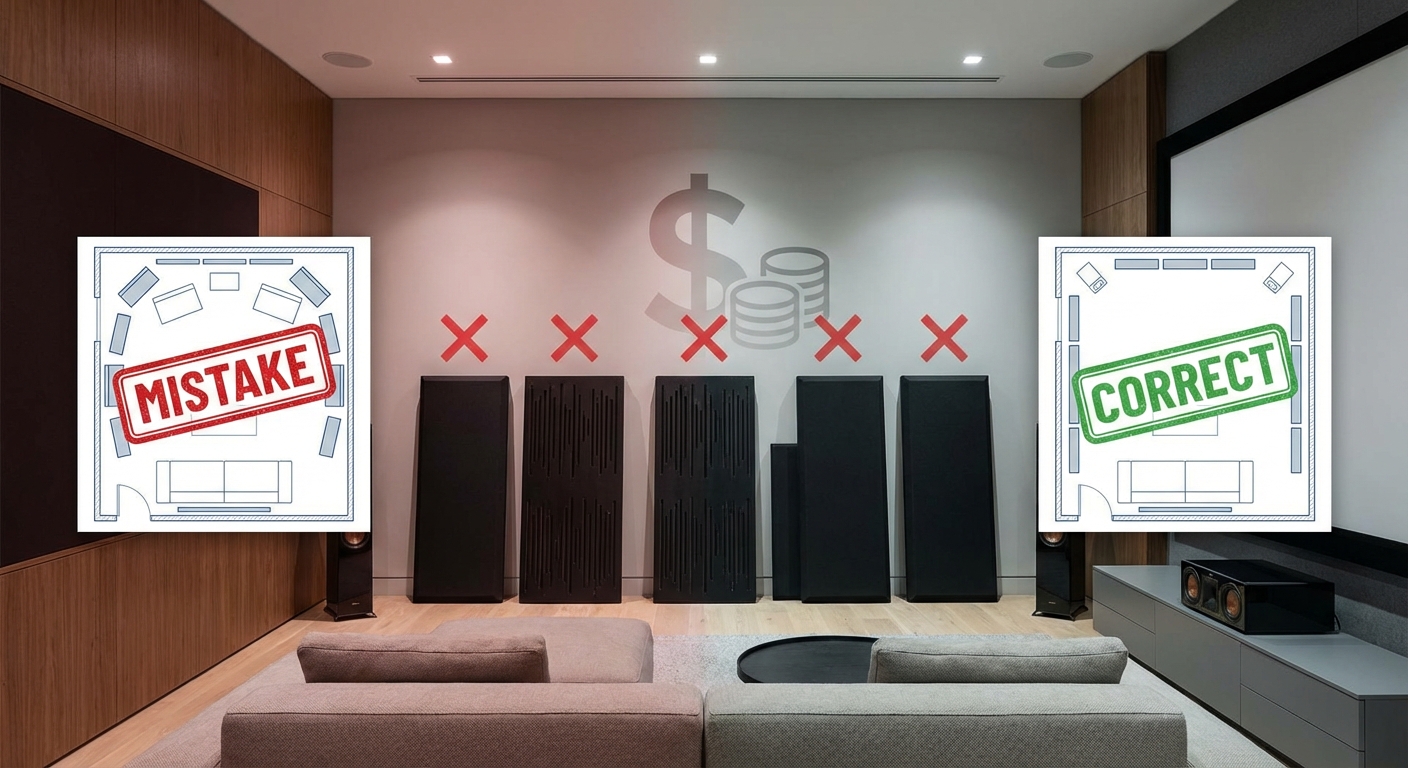
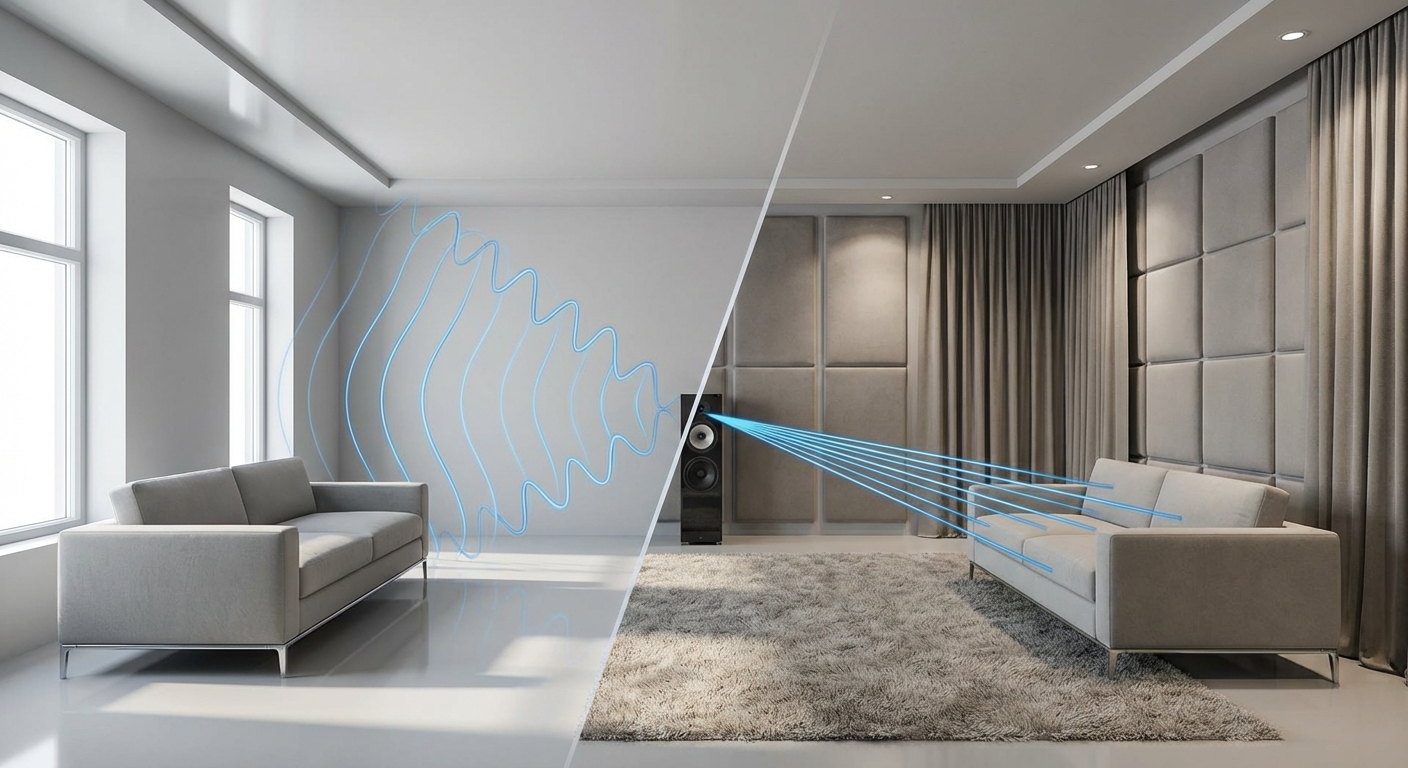
Your surround sound system cost hundreds of dollars, but right now it sounds like you’re listening through a cardboard box. The culprit? That oversized couch sitting directly in front of your center channel.
Most people arrange their living room around comfort first and sound second. That approach leaves you with blocked speakers, muddy dialogue, and corners where the audio just disappears. You don’t need to choose between a functional layout and great acoustics. You can have both with the right furniture placement strategy.
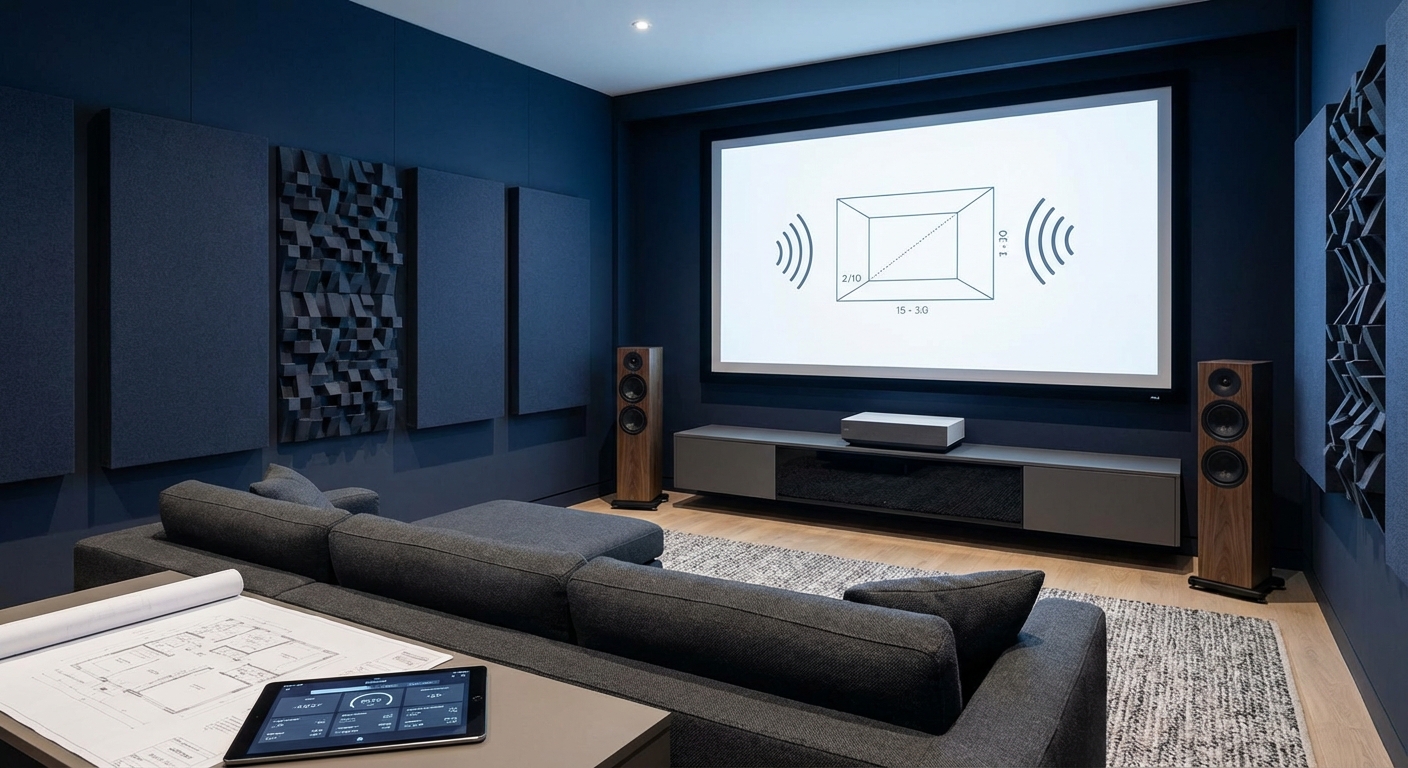
Arranging furniture without blocking speakers requires maintaining clear line of sight between speakers and listeners, keeping furniture below speaker height, and avoiding corners that trap sound. Position seating at ear level with your tweeters, leave 2-3 feet of clearance around speakers, and use low-profile furniture between your listening position and speakers. Strategic placement eliminates dead zones while maintaining room functionality.
Understanding Speaker Line of Sight
Sound waves travel in straight lines from your speakers to your ears. Anything in that path absorbs, reflects, or scatters the audio.
Your center channel speaker carries 60% of movie dialogue. When you place a coffee table, ottoman, or storage chest directly in front of it, you’re filtering out the high frequencies that make speech intelligible. The sound reaches you, but it’s muffled and unclear.
The same principle applies to your surround speakers. A tall bookshelf behind your couch blocks the rear channels. A floor lamp next to your front left speaker creates reflections that mess with stereo imaging.
Here’s what you need to maintain:
- Unobstructed path from tweeters to ear level at your main seat
- 2-3 feet of clearance on all sides of tower speakers
- No furniture taller than your speaker cones between you and the drivers
- Clear space above subwoofers (sound waves are omnidirectional below 80Hz, but furniture still dampens output)
Think of it like watching your TV. You wouldn’t put a bookcase between your eyes and the screen. Apply the same logic to your speakers.
The Height Rule That Changes Everything
Most furniture sits between 18 and 36 inches tall. Most speaker tweeters sit between 36 and 42 inches off the floor when properly positioned.
This height difference is your friend.
Low-profile furniture can sit between you and your speakers without blocking sound. A 20-inch coffee table doesn’t interfere with drivers mounted at 40 inches. A 28-inch media console works perfectly under bookshelf speakers on stands.
Problems start when you stack items. That low console is fine until you add a sound bar, decorative boxes, and a row of picture frames. Now you’ve built a 38-inch barrier that blocks your center channel.
Here’s a practical furniture height guide:
| Furniture Type | Typical Height | Speaker Impact | Best Placement |
|---|---|---|---|
| Coffee table | 16-18 inches | Minimal | Between seating and TV |
| Ottoman | 18-20 inches | None | Anywhere except directly in front of speakers |
| Console table | 28-32 inches | Moderate | Behind sofa, not between speakers |
| Bookshelf | 60-84 inches | Severe | Side walls only, never between listening position and speakers |
| Floor lamp | 58-64 inches | High | Corners or behind seating |
Measure your speaker heights before you buy furniture. A tape measure prevents expensive mistakes.
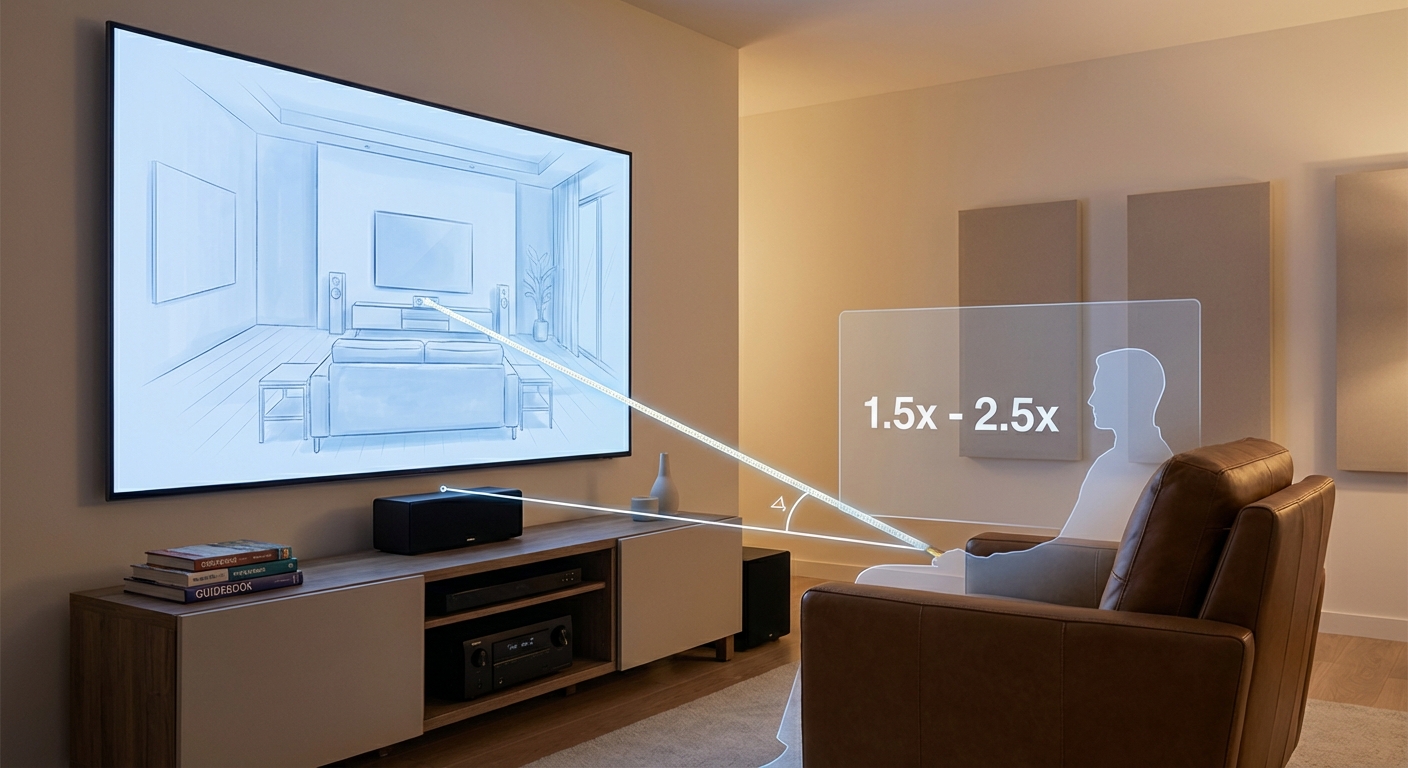
Creating the Triangle Without Dead Zones
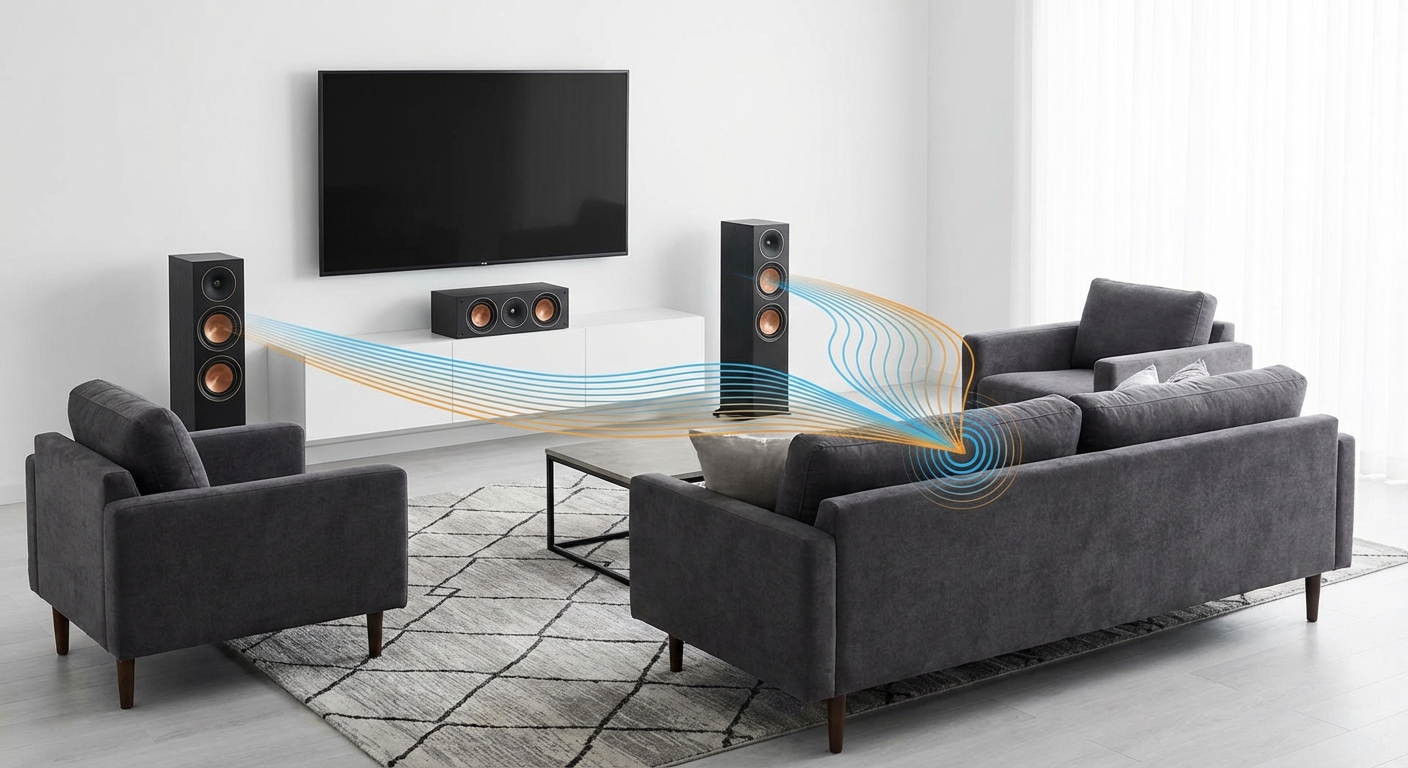
The stereo triangle is audio 101. Your left speaker, right speaker, and listening position form an equilateral triangle. Each side measures the same distance.
But most living rooms aren’t empty studios. You have doors, windows, built-in features, and multiple seating areas. The triangle needs to work around real life.
Start with your primary listening position. This is where you sit most often for serious listening or movie watching. Place your front left and right speakers to form a 60-degree angle from this spot.
Now add your other furniture using these steps:
-
Mark your speaker positions with tape on the floor. Don’t move them yet. Just mark where they’ll go.
-
Place your main seating first. Couch, recliner, or chair. This goes at the triangle’s apex.
-
Add side furniture that stays below speaker height. End tables, floor cushions, low storage.
-
Position secondary seating outside the triangle. Extra chairs go to the sides or behind, never between the front speakers.
-
Test the layout by sitting in each seat. Can you see all speaker drivers? If not, adjust.
-
Fill remaining space with accent pieces. Plants, small tables, floor poufs.
This sequence prevents the most common mistake: arranging all your furniture first, then trying to squeeze speakers into whatever space is left.
Your room might have dead zones where multiple surfaces create acoustic nulls. These spots occur when reflected sound waves cancel out direct sound. Moving furniture by just 18 inches often eliminates them.
Walk around your room while playing a test tone. You’ll hear volume drop in dead zones. Mark these spots and keep heavy furniture out of them.
Floating Furniture Away From Walls

Every piece of furniture doesn’t need to hug the walls. Pulling your couch 2-3 feet into the room solves multiple problems at once.
First, it creates space for rear surround speakers. Those speakers need to sit slightly behind and above your listening position. When your couch backs up against the wall, you have nowhere to put them except on the wall itself, which is too high and too far back.
Second, it reduces bass buildup. Corners and wall junctions amplify low frequencies. Your subwoofer might sound boomy because your couch is vibrating against the wall, not because the sub is poorly calibrated.
Third, it opens up pathways. You can walk behind the furniture without blocking speakers or creating temporary acoustic barriers.
“The single biggest improvement most people can make is moving their seating away from the back wall. You gain flexibility for speaker placement, reduce room mode issues, and create a more spacious feel. Even 24 inches makes a dramatic difference.”
Floating furniture feels wrong if you’re used to perimeter arrangements. It looks like you didn’t finish decorating. But it’s the professional approach for rooms where audio matters.
Define the floating area with a large area rug. This grounds the furniture visually and adds acoustic treatment. The rug absorbs floor reflections that would otherwise bounce into your speakers and create comb filtering.
Low-Profile Solutions for Tight Spaces
Small rooms force compromises. You might not have space to float furniture or maintain ideal speaker distances. That’s when you need creative solutions that prioritize function without destroying acoustics.
Wall-mounted speakers eliminate floor space conflicts entirely. Your front left and right speakers attach directly to the wall at the correct height and angle. Nothing can block them because there’s no furniture tall enough.
Slim console tables work better than bulky entertainment centers. A 12-inch-deep console holds your components and display but doesn’t project into the room. Your center channel sits on top with clear line of sight to the seating.
Armless chairs and benches provide seating without the bulk of traditional sofas. They’re easy to reposition and don’t create large acoustic barriers. Two armless chairs often work better than one oversized sectional.
Floor cushions and poufs add flexible seating that you can move for listening sessions. Stack them in a corner when you want the full audio experience, then spread them out for casual TV watching.
Consider these space-saving tactics:
- Mount your TV and put the center channel on a low stand beneath it
- Use speaker stands instead of placing bookshelf speakers on furniture
- Choose furniture with legs instead of solid bases (sound passes underneath)
- Install floating shelves for decorative items instead of floor-standing bookcases
- Pick a loveseat over a full sofa if you typically watch alone or with one other person
The goal is maintaining acoustic paths while keeping the room livable. You’re not building a recording studio. You’re optimizing a space you actually use.
Dealing With Corners and Alcoves
Corners are acoustic traps. Bass frequencies build up in them. High frequencies disappear into them. They’re where sound goes to die.
They’re also where people instinctively put furniture. That empty corner looks unfinished, so you stick a plant stand or reading chair there. Now you’ve created a dead zone and blocked your surround speaker.
Better corner strategies:
- Leave corners empty and treat them with bass traps if room modes are severe
- Use very low furniture (under 24 inches) that won’t interfere with sound propagation
- Place decorative items without large flat surfaces that cause reflections
- Position floor lamps in corners only if they don’t sit between speakers and listening position
Alcoves present different challenges. These recessed areas near windows or doorways seem perfect for speakers. They’re not.
An alcove creates a mini echo chamber. Your speaker fires forward, but the alcove walls reflect sound back into the driver. This causes phase cancellation and muddy output. The speaker sounds worse than if you placed it in open space.
If you must use an alcove for a speaker, pull the speaker forward so it’s flush with the alcove opening. Add acoustic panels to the alcove’s back and side walls. This minimizes reflections without requiring you to relocate the speaker entirely.
For furniture in alcoves, keep items low and soft. An upholstered bench in a window alcove is fine. A hardwood bookcase is not.
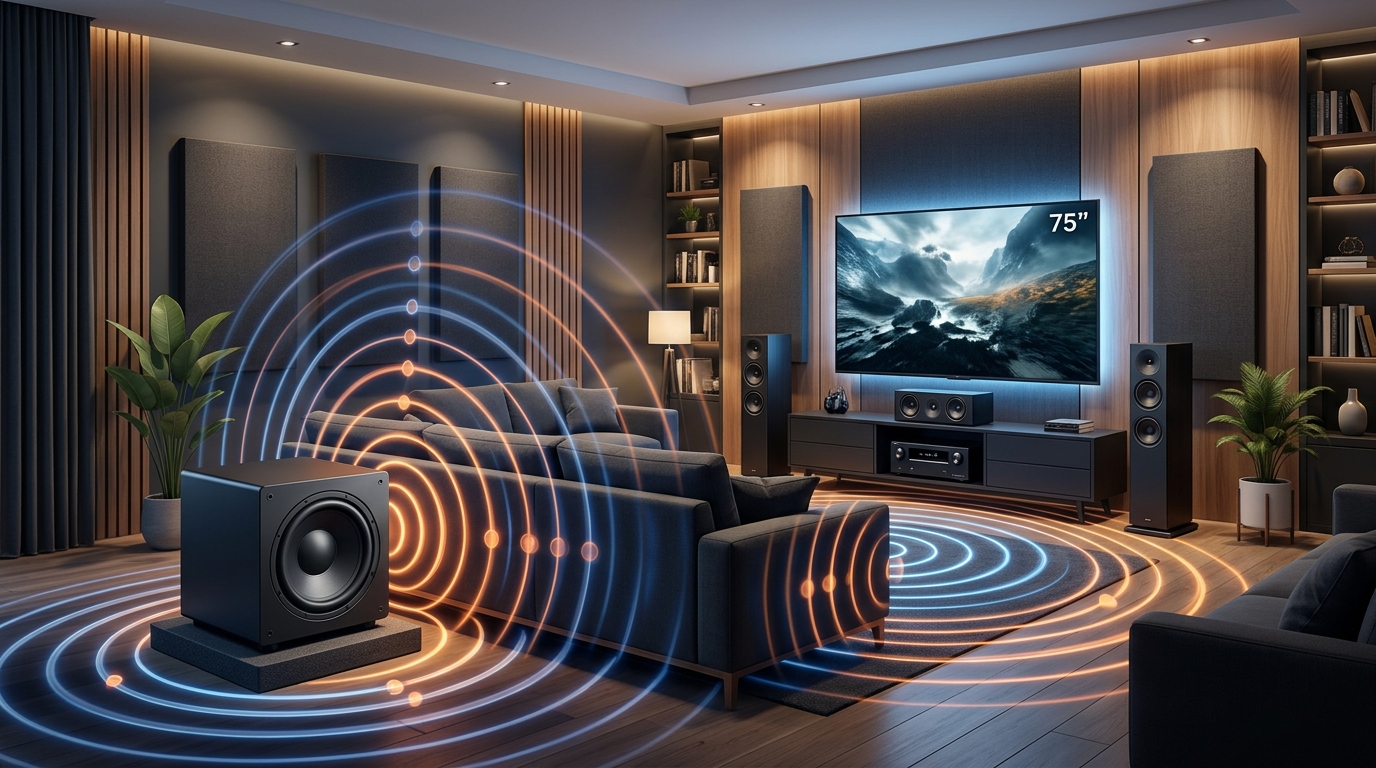
The Subwoofer Placement Exception
Subwoofers don’t follow the same rules as other speakers. Low frequencies are non-directional below 80Hz. You can’t tell where the bass is coming from.
This gives you flexibility. Your subwoofer can go in a corner, behind furniture, or next to the couch. Location matters for output level and room modes, not for blocking sound waves.
But furniture still affects subwoofer performance. A sub tucked behind a solid couch loses output. The couch absorbs some of the energy before it reaches your ears. You’ll turn up the gain to compensate, which increases distortion.
Better subwoofer positions:
- Front corners for maximum output (but watch for boominess)
- Midpoint of the front wall for balanced response
- Near your main listening position for tight integration with front speakers
- Opposite corner from your seating for more even distribution in large rooms
Test placement using the subwoofer crawl method. Put the sub in your main seat. Play a bass-heavy track. Crawl around the room’s perimeter. When you hear the tightest, most even bass, that’s where your listening position should be. Or reverse it: that’s where the sub should go if your seating can’t move.
Furniture placement around subs is simpler than around main speakers. Just leave 6-12 inches of clearance so the driver can move air freely. Don’t stack items on top of the sub. Don’t press it tight against furniture.
The sub needs to breathe. Give it space and it’ll reward you with clean, powerful bass that you feel as much as hear.
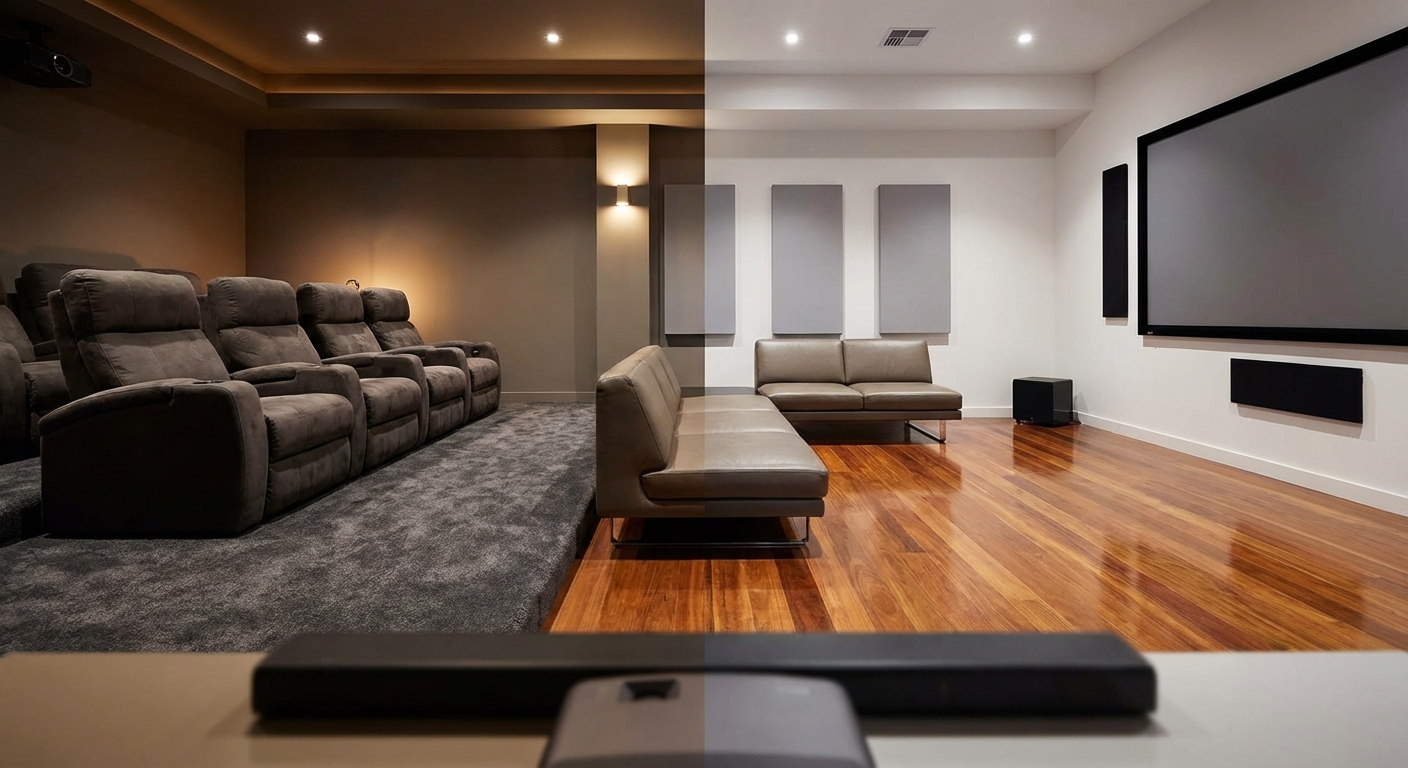
Room Layout Patterns That Actually Work
Three furniture arrangements handle speakers well while maintaining room functionality. Pick the one that matches your space and adapt it to your specific dimensions.
The Theater Setup
Main seating faces the TV wall. Front left, center, and right speakers flank the display. Surround speakers mount on side walls or stands beside the couch. Rear speakers attach to the back wall or sit on stands behind the seating.
This layout works best in dedicated media rooms or basements. It prioritizes audio over conversation areas. Everyone faces forward. The room has a clear purpose.
Use this when your room is at least 12 feet deep and you can dedicate the space primarily to watching content.
The L-Shaped Arrangement
A sectional or two separate seating pieces form an L. The TV and front speakers occupy one wall. Side speakers sit at the L’s corner. This creates a defined listening zone while leaving the rest of the room open.
This layout works in combined living and dining spaces. The L defines the media area without blocking pathways to other parts of the room.
Use this when you need multipurpose space but still want proper speaker placement for your main viewing area.
The Floating Island
Seating pulls into the room’s center. Speakers surround it on all sides. Side tables and low storage define the perimeter. Pathways remain clear around the outside.
This layout works in large, open-concept spaces. It creates an immersive listening environment and makes the room feel intentionally designed rather than pushed against walls.
Use this when you have at least 16 feet in both directions and want to make a statement with your setup.
All three patterns maintain speaker clearance and prevent blocking. Choose based on your room size, shape, and how you use the space beyond watching movies.
Testing Your Layout Before Committing
You don’t need to move heavy furniture multiple times. Test your layout with temporary markers first.
Use painter’s tape to mark speaker positions on the floor and walls. Cardboard boxes can stand in for speakers during testing. Folding chairs represent seating positions.
Sit in your temporary setup. Play a familiar track with good stereo separation. Close your eyes and listen for:
- Clear distinction between left and right channels
- Dialogue that sounds centered and natural
- Surround effects that come from behind and beside you, not from vague directions
- Bass that’s tight and controlled, not boomy or missing
Walk around the room while audio plays. Note any spots where the sound changes dramatically. These are dead zones or reflection points.
Have someone else sit in the main position while you stand near each speaker. Can they see the speaker drivers? If their view is blocked, sound is blocked too.
Make adjustments to your tape marks before moving real furniture. This saves your back and your patience.
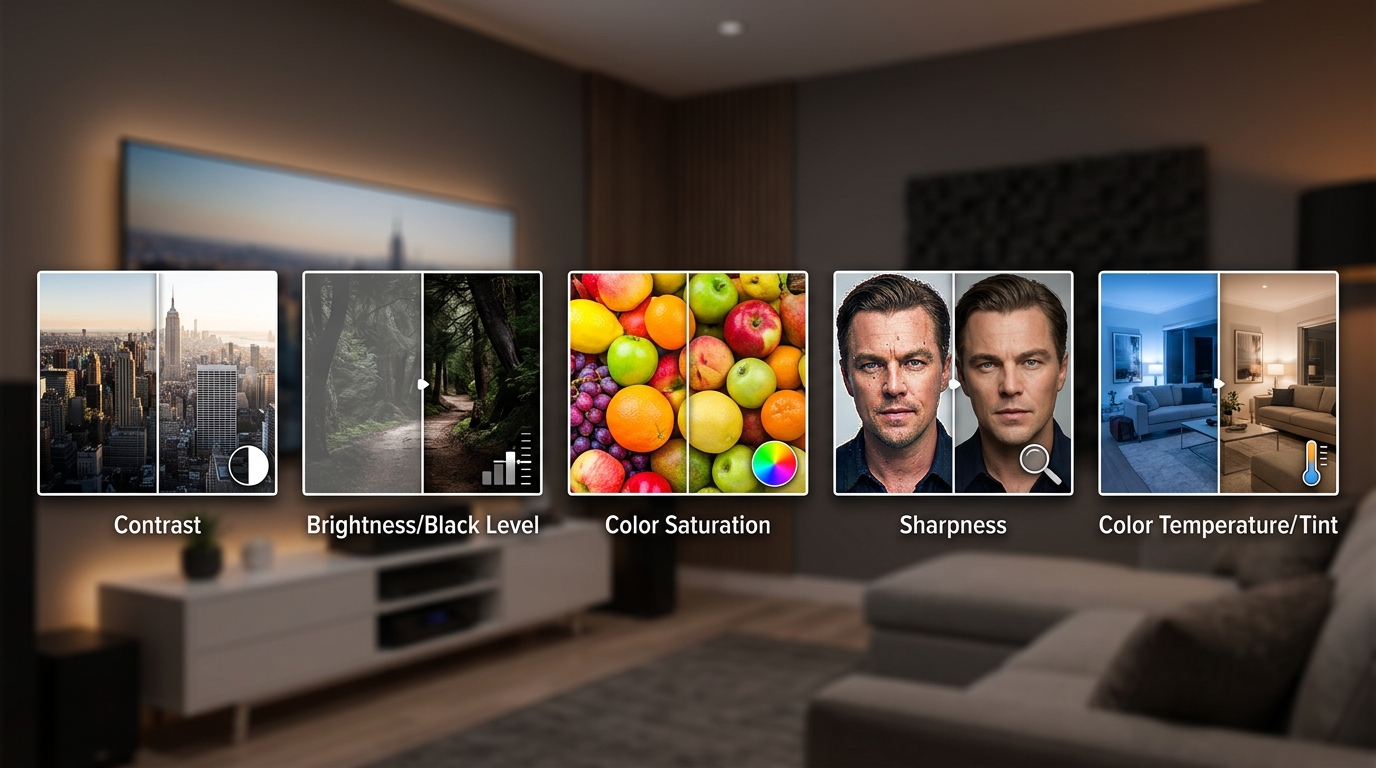
Once you’re satisfied with the temporary layout, move your actual furniture to match. Then run a proper calibration using your receiver’s setup microphone. The calibration adjusts levels and delays to compensate for any remaining acoustic issues.
If you’re planning new furniture purchases, bring your room measurements and speaker positions to the store. Many retailers have floor models you can measure. Knowing exact dimensions prevents buying a console that’s 4 inches too tall or a couch that’s 6 inches too deep.
Making Adjustments After You’ve Arranged Everything
Your first layout won’t be perfect. That’s expected. Audio is trial and error even for professionals.
Common problems and fixes:
Muddy dialogue: Your center channel is too low or blocked. Raise it to ear level when seated. Remove anything sitting in front of it.
Weak surround effects: Side and rear speakers are too far away or too high. Move them closer to listening position and aim them at ear level.
Boomy bass: Subwoofer is in a corner or too close to walls. Move it away from boundaries or add bass traps to the corners.
Harsh treble: Hard surfaces are reflecting high frequencies. Add soft furnishings like throw pillows, blankets, or upholstered pieces.
Uneven volume between speakers: Furniture is absorbing sound from one speaker more than others. Reposition furniture or adjust speaker angles.
Small changes make big differences. Moving a speaker 6 inches can eliminate a dead zone. Angling a tower speaker 15 degrees inward improves stereo imaging. Adding a thick rug reduces floor reflections that cause comb filtering.
Keep a notebook of changes and their effects. “Moved left speaker 8 inches forward, bass improved but treble became harsh.” This helps you track what works and what doesn’t.
If you’ve tried multiple arrangements and still have issues, the problem might not be furniture placement. Consider whether you need to address echo and room acoustics with treatment panels or if your TV positioning needs adjustment.
Special Considerations for Different Room Types
Not all rooms follow standard layouts. Your space might have features that require adapted approaches.
Long, narrow rooms: Avoid placing speakers at the narrow ends. This creates excessive distance between fronts and surrounds. Instead, position your setup along the long wall. Use the room’s length for seating depth rather than speaker spread.
Rooms with vaulted ceilings: High ceilings reduce early reflections but can make the space feel acoustically dead. Lower your speakers slightly and angle them up toward the listening position. Add wall treatments at the first reflection points.
Open floor plans: Define your listening area with furniture arrangement and area rugs. Treat the space as a room within a room. Use bookcases or screens as partial dividers that block visual distractions without creating solid acoustic barriers.
Rooms with large windows: Windows reflect sound and let in noise. Heavy curtains solve both problems. Close them during listening sessions. Position speakers so they’re not firing directly at window glass.
Basement or bonus rooms: These spaces often have low ceilings and concrete walls. Excessive reflections are common. Add thick rugs, upholstered furniture, and wall panels. Keep speakers away from walls by at least 2 feet.
Bedrooms: Limited space forces compromises. Wall-mount your speakers or use compact bookshelf models on stands. Keep the bed low-profile so it doesn’t block sound. Position speakers on the wall opposite the bed or on side walls angled toward the viewing position.
Each room type has acoustic quirks. Work with your space’s characteristics rather than fighting them.
Furniture Pieces That Help Instead of Hurt
Some furniture improves acoustics while serving practical purposes. These pieces earn their place in an audio-focused room.
Upholstered ottomans: Absorb reflections, provide seating, and stay low enough to avoid blocking speakers. They’re movable for layout changes.
Open-frame bookcases: Break up large wall surfaces without creating solid barriers. Sound passes through the gaps between shelves. Use them as room dividers that maintain acoustic transparency.
Thick area rugs: Reduce floor reflections and define spaces. A 9×12 rug under your seating area makes a measurable difference in sound quality.
Low media consoles with open shelving: Hold components while keeping sightlines clear. Open shelves prevent bass buildup inside enclosed cabinets.
Acoustic panels disguised as art: Serve double duty as decoration and treatment. Frame fabric-wrapped panels in colors that match your decor.
Floor poufs and bean bags: Provide flexible seating that you can move or remove entirely. They’re perfect for kids or guests who don’t need the primary listening position.
Furniture with angled legs: Raises pieces off the floor so sound waves can pass underneath. Tapered legs look modern and improve acoustics.
Avoid these furniture types in audio rooms:
- Glass-top tables (create harsh reflections)
- Solid-door entertainment centers (trap bass and block speakers)
- Metal shelving units (ring and resonate)
- Furniture with large flat surfaces facing speakers
Choose pieces that work with sound propagation, not against it. Your room will look better and sound better.
Making It Work in Your Space
You’ve learned the principles. Now apply them to your actual room with your actual furniture and your actual speakers.
Start with one change. Move your couch away from the wall. Raise your center channel. Angle your front speakers. Pick the adjustment that addresses your biggest audio complaint.
Listen for a week. Let your ears adapt. Then make another change.
Perfect speaker placement and furniture arrangement is iterative. You’ll adjust positions multiple times before everything clicks. That’s normal. Even acousticians make incremental tweaks.
The effort pays off the first time you watch a movie and actually understand every word without turning on subtitles. Or when you hear instruments positioned precisely in the stereo field during your favorite album. Or when your friends comment on how good your system sounds.
Your furniture can coexist peacefully with your speakers. You just need to think about both when you arrange the room.


Leave a Reply